05. September 2019 · Comments Off on GOTOH MG-T Locking Tuning Machines · Categories: Guitar Parts

MG-T thumbscrew-style locking tuners use a very simple functionality for locking and unlocking of strings with Gotoh technology.

GOTOH uses standard rotation of thumbwheel to lock and unlock the posts….think..righty-tighty…lefty-loosy.
Notice: Please be advised that thumbwheels do not need to cranked super tight to lock the strings. The specially designed locking pins are rounded to kink the string to help prevent the strings from working loose. Over-tightening the lock can possible break the tuning machines.

Post Dimensions Option

The MG-T are available in 3 different post heights/lengths.
You can choose several combinations for your own staggered posts.

MG-T Post Dimensions
The 3 dimensions Short 18.5mm, Long 20mm and Extra-Long 21.5mm are available.
Standard set for L3 + R3 are all Long 20mm posts.
Standard set for 6 in line for both strat and tilt back headstocks are 3 x Short 18.5mm for 1st-3rd strings and 3 x Long 20mm for 4th-6th strings.
**An exception to the 3 short and 3 long posts would be when installing on a guitar that has a thicker than normal headstocks like some ESP/LTD guitars. In this case, your would use 3 long and 3 ex-long posts.

12. August 2019 · Comments Off on GOTOH Stud-Lock® · Categories: Guitar Parts

The Stud-Lock® mechanism is implemented to all of GOTOH’s 2 post anchor type tremolos (510, GE1996 and Wilkinson series) and 510 series bridges and tailpieces. This mechanism removes the gap between the height adjustable stud and anchor by the stud-lock screw inside of the stud. As the results, you will have better and enhanced tone transfer from the strings to the guitar body.

GOTOH Stud-Lock Bridge Posts

① The stud-lock screw penetrates through inside of the stud.
② There are two Allen head adjustments are inside of the stud. 1.5mm for Stud-Lock and 3mm for stud(bridge) height.
③ Insert the 1.5mm Allen key to make sure the Stud-Lock screw is fully inside the studs.
④ Insert the stud into the anchor and adjust the height by 3mm Allen key.
⑤ After the height is determined, insert the 1.5mm Allen key again and tighten the stud-lock screw until the screw touches the bottom of the anchor.
⑥ Then tighten more firmly to make sure that the stud doesn’t move.

** CAUTION:When adjusting the bridge height, make sure your strings are loose. If you make this adjustment while your strings are at normal tension, it may cause some wear on the bridge plate where it presses against the stud.

30. April 2018 · Comments Off on Printable PDF for Measuring Pickup Pole Spacing · Categories: General, Tools · Tags: , , , , , ,

One of the most common questions we get is “What pickup covers will fit my guitar?”. Sometimes I actually do know what size cover will fit a specific pickup. A good example would be “What covers will fit a Gibson ’57 Classic?”. The Gibson ’57 Classic need a 1 15/16″ (49.2mm) pole spaced covers. Easy. A harder question would be “What size cover do I need for my Gibson?”, “What fits a PRS SE?”, “Do you know what size covers will fit a Bare Knuckle Pickup?” or “I have a guitar from the 1970’s, what size should I order?”. My standard answer to all those questions has always been “Please measure the center to center distance between the two outside pole screws”.

OK, let me get to the reason for this free downloadable PDF. I had a customer ask me a few weeks ago what is the correct size he needs for his pickup. I gave him my standard response to measure the center to center distance… His reply was “do you really think I can tell the difference between 1mm!”. That actually got me think that there must be an easier way because deciphering all the small lines on a ruler can be difficult and also error-prone.

So my solution is this printable PLTS Pole Spacing Tool. I set it up to only show one pole spacing at a time so there is no counting the little lines on a ruler. All that needs to be done is line up the dashed lines to the center of the pole screws. It is set up with all of the pole spacing we offer at Philadelphia Luthier Tools…48mm, 49.2mm, 50mm, 51mm, 52mm, and 53mm. I even added fold lines to help you fold the PDF so it will easily fit under the strings.

Here are some helpful hints for printing and using this tool. First, very important, this PDF needs to be printed actual size with no scaling of the page to be accurate. it has probably defaulted to something like “90%” or “fit to page”. You will have to look around since they aren’t always described the same way or sometimes hidden. I use Google Chrome browser. When the print dialog box comes up, it is hidden under “+ more setting”. The setting is called scale. In the case of Google Chrome, you want to set the scale to be 100%. Included on the printout are 2 square boxes. One represents 1″ and the other 25mm. Only use the tool if they measure exactly 1″ or 25mm.

Second, make sharp creases when folding the PDF. It will help tremendously when measuring the pole spacing. A loosely folded paper won’t allow you to get close enough to see the center of pole screws accurately.

Third, always measure all of the pickups. A lot of manufacturers will use a different pole spacing for both the bridge and neck pickups while others will use the same for both positions.

Download the PDF here

Here are some pictures of how to fold and use the tool.

Step one in folding the PLTS Pickup Spacing Tool

First, crease and fold at the outside fold marks inward.

Step two in folding the PLTS Pickup Spacing Tool

Second, fold the next two marks towards the center.

Finished PTLS Pole Spacing Tool

This is how the completed tool should look like.

Checking pole spacing of the neck pickup

Line up the dashed line with the center of the E to e pole screws.

Checking the pole spacing of the bridge pickup

Line up the dashed lines with the center to the outside pole screws.

10. December 2014 · Comments Off on Unplated Pickup Covers…part 2 · Categories: General · Tags: , , ,


Hand polished unplated pickup cover

Last week I showed you how to achieve a brushed metal look using a Scotch Brite pad and a non-plated pickup cover. Next, we will hand polish a raw unplated pickup cover and then make it look like an aged pickup cover with faux string lines.

First, you will need a metal polishing compound and some old rags.  Any brand metal polishing compound will work fine.  You can use the metal polish impregnated cloth called “Miracle Cloth”. This is what I used to achieve the look you see here. It works great for polishing frets too. One warning about metal polish….don’t use it to polish any gold-plated parts.  It can strip the gold plating off very fast!

PLEASE READ:  We recommend you wear protective gloves while working with unplated pickup covers. The bottom edge can be very sharp and can easily cut your finger. Filing the bottom edge smooth before you start work is also an option.

We will begin by applying a small amount of metal polish to the rag and rubbing it into the surface of the pickup cover. Use circular motions until you have covered the entire surface. Periodically, wipe off the polishing compound to see how you are progressing. If you are happy with the result, you can continue buffing until the pickup cover is bright and shiny. Use a new cloth or a different area of the cloth when doing the final polish.


Hand polished unplated pickup coversNow that we have a nice hand polished pickup cover, lets add an aged look with faux string lines. You will need some painter’s masking tape cut into very thin 1/32″ strips and some very fine grit Micro Mesh soft touch sanding pads.  The three highest grits (6000, 8000, and 12000) will work best because you only want very light marks.

1.  Lay out the thin strips of painters tape over the screw holes to simulate the string location and then trim the extra tape.   Applying some pressure on the tape will help keep it in place during the sanding process.

String lines step 2String lines step 3


2,  Sand lightly with Micro Mesh soft touch sanding pad.   It will take some experimenting to get the right look.   Try pressing the sanding pad into the edge of each piece of tape.  This will help emphasize the string line.

String lines step 4Initial sanding of pickup coverString lines step 6 Close up of sanding

3.  To help soften the look, I like to rub the front of the pickup cover on an old piece of carpeting.   Here I am rubbing the pickup cover on the carpet on my workbench.

Using carpet to soften the sanding marks

4.  OK…it’s all done.  This is not my best work but you get the idea.   The nice thing about working with unplated pickup covers is you can easily re-polish the cover and start over if you don’t like the results!

Close up of completed string linesString Lines finished


If you have any questions you can send us an email at support.

18. November 2014 · Comments Off on Unplated Raw Pickup Covers…part 1 · Categories: General · Tags: , , , ,

Unplated Raw Pickup Cover 2Most of the guitar pickup covers we sell at Philadelphia Luthier Tools & Supplies are available in Chrome, Nickel, Gold, Jet/Smoked Black Nickel, and Unplated Raw. The unplated pickup cover is the most popular we sell. It’s either because they are cool looking, inexpensive or maybe both?  Besides being unplated, they are absolutely unfinished and haven’t had anything done to them. Because of this, they can arrive with minor scratches, scuffs and a little grease from the manufacturing process. If these are going to be plated by the manufacture, they will still need to be buffed to remove any defects prior to plating.

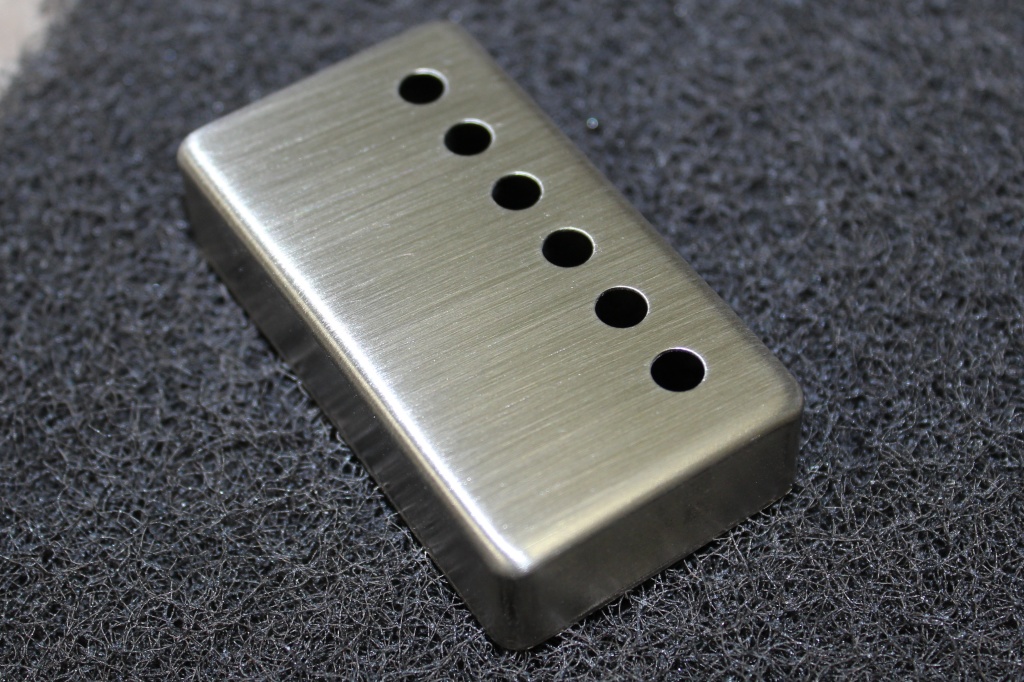
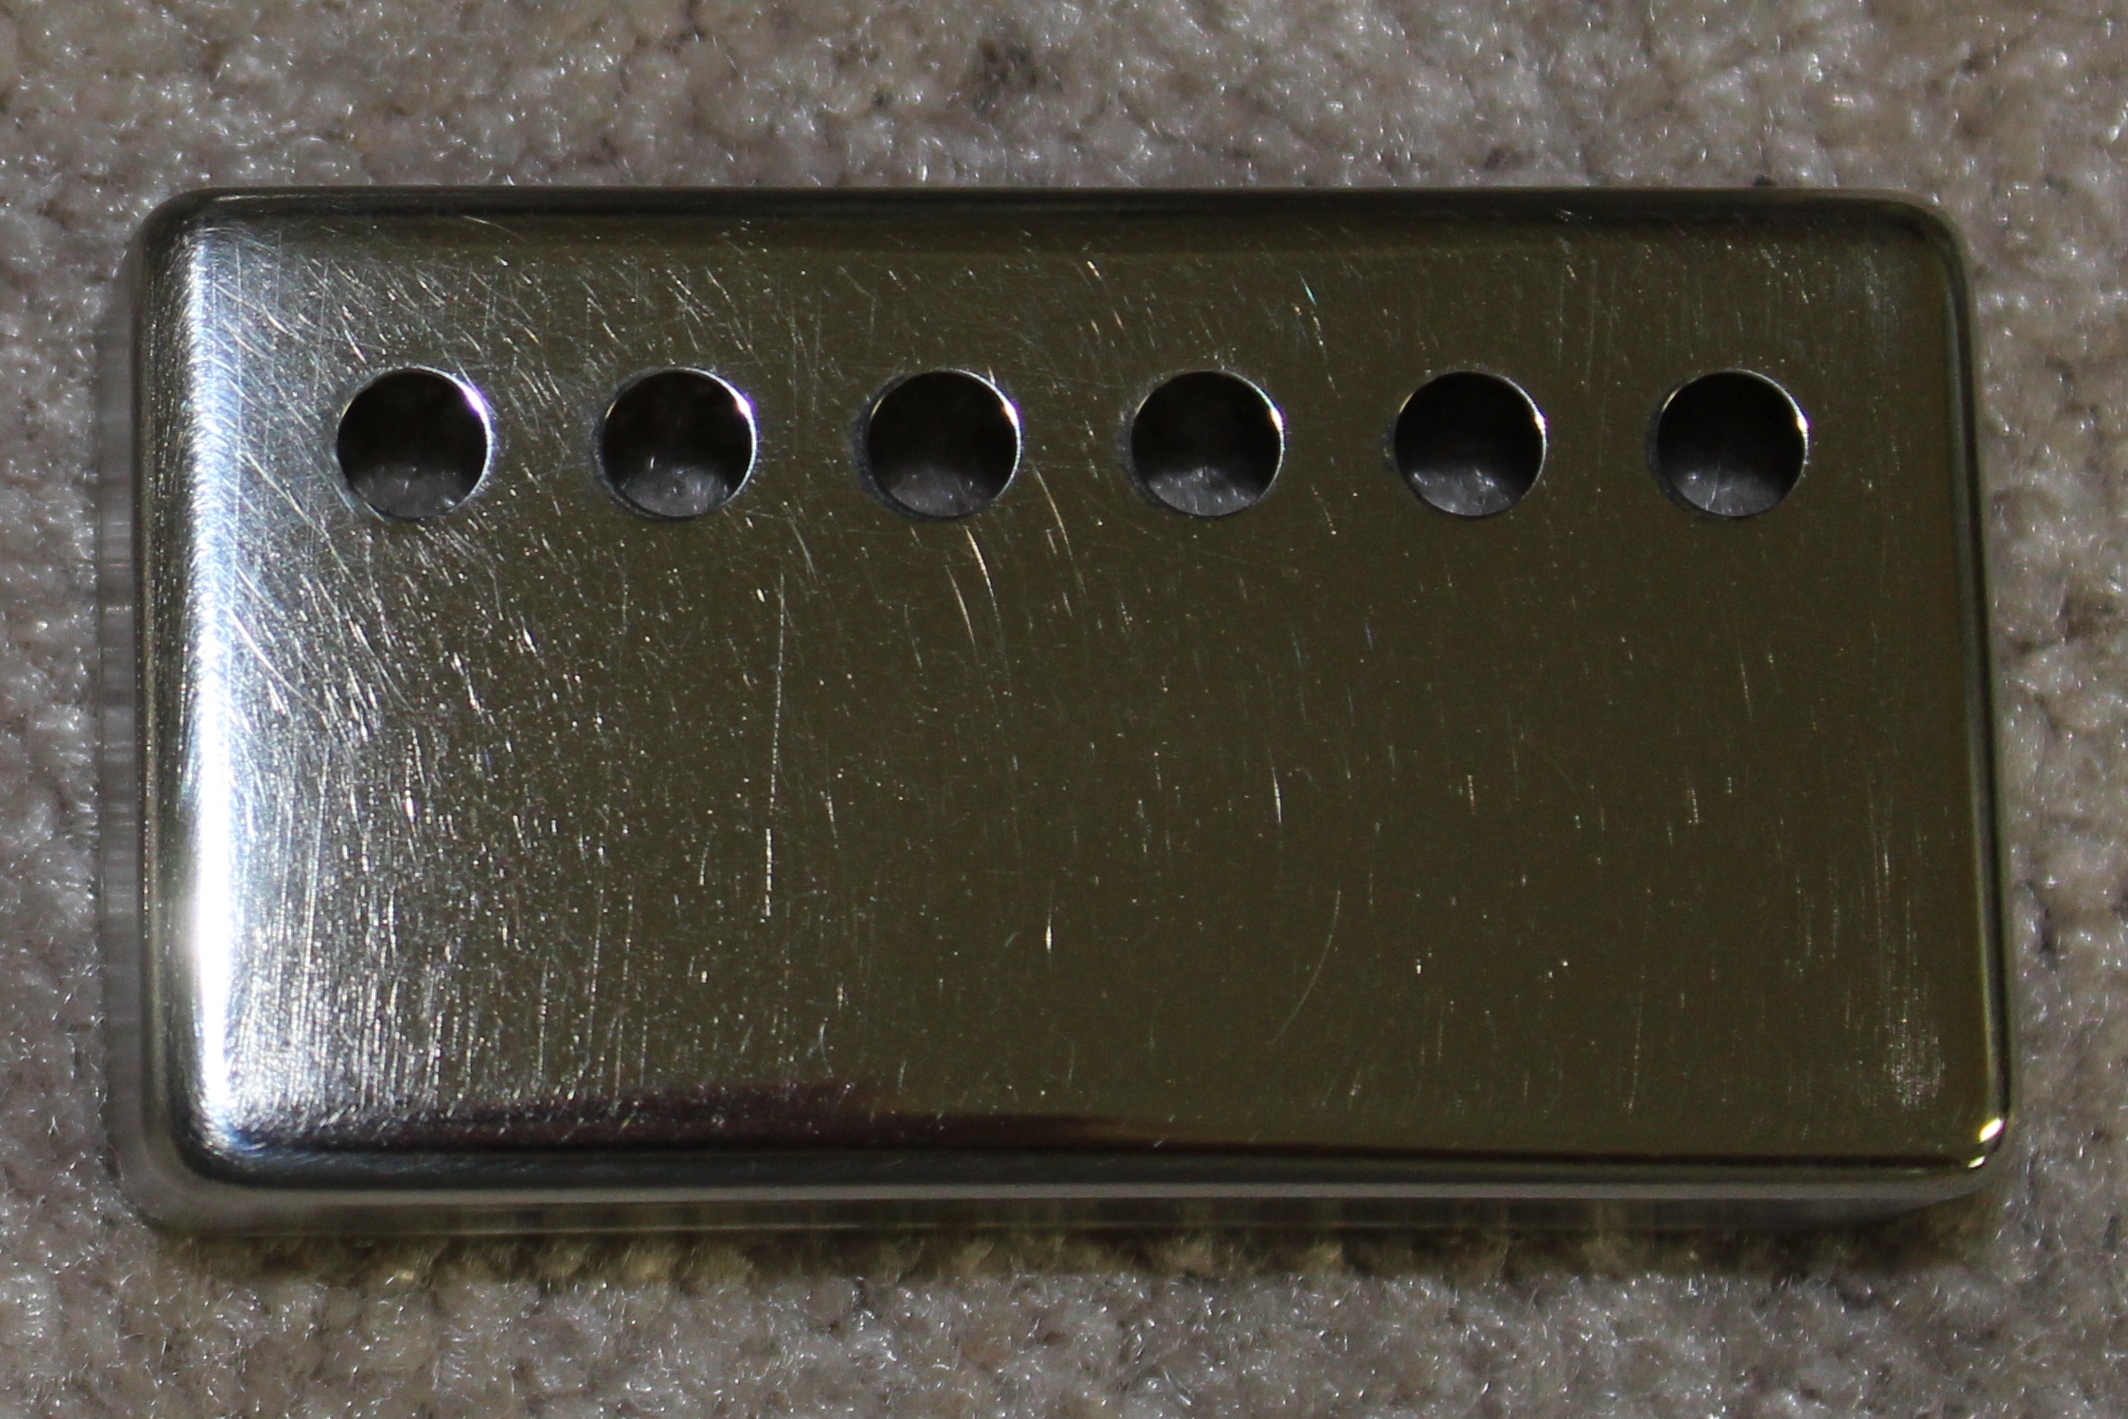
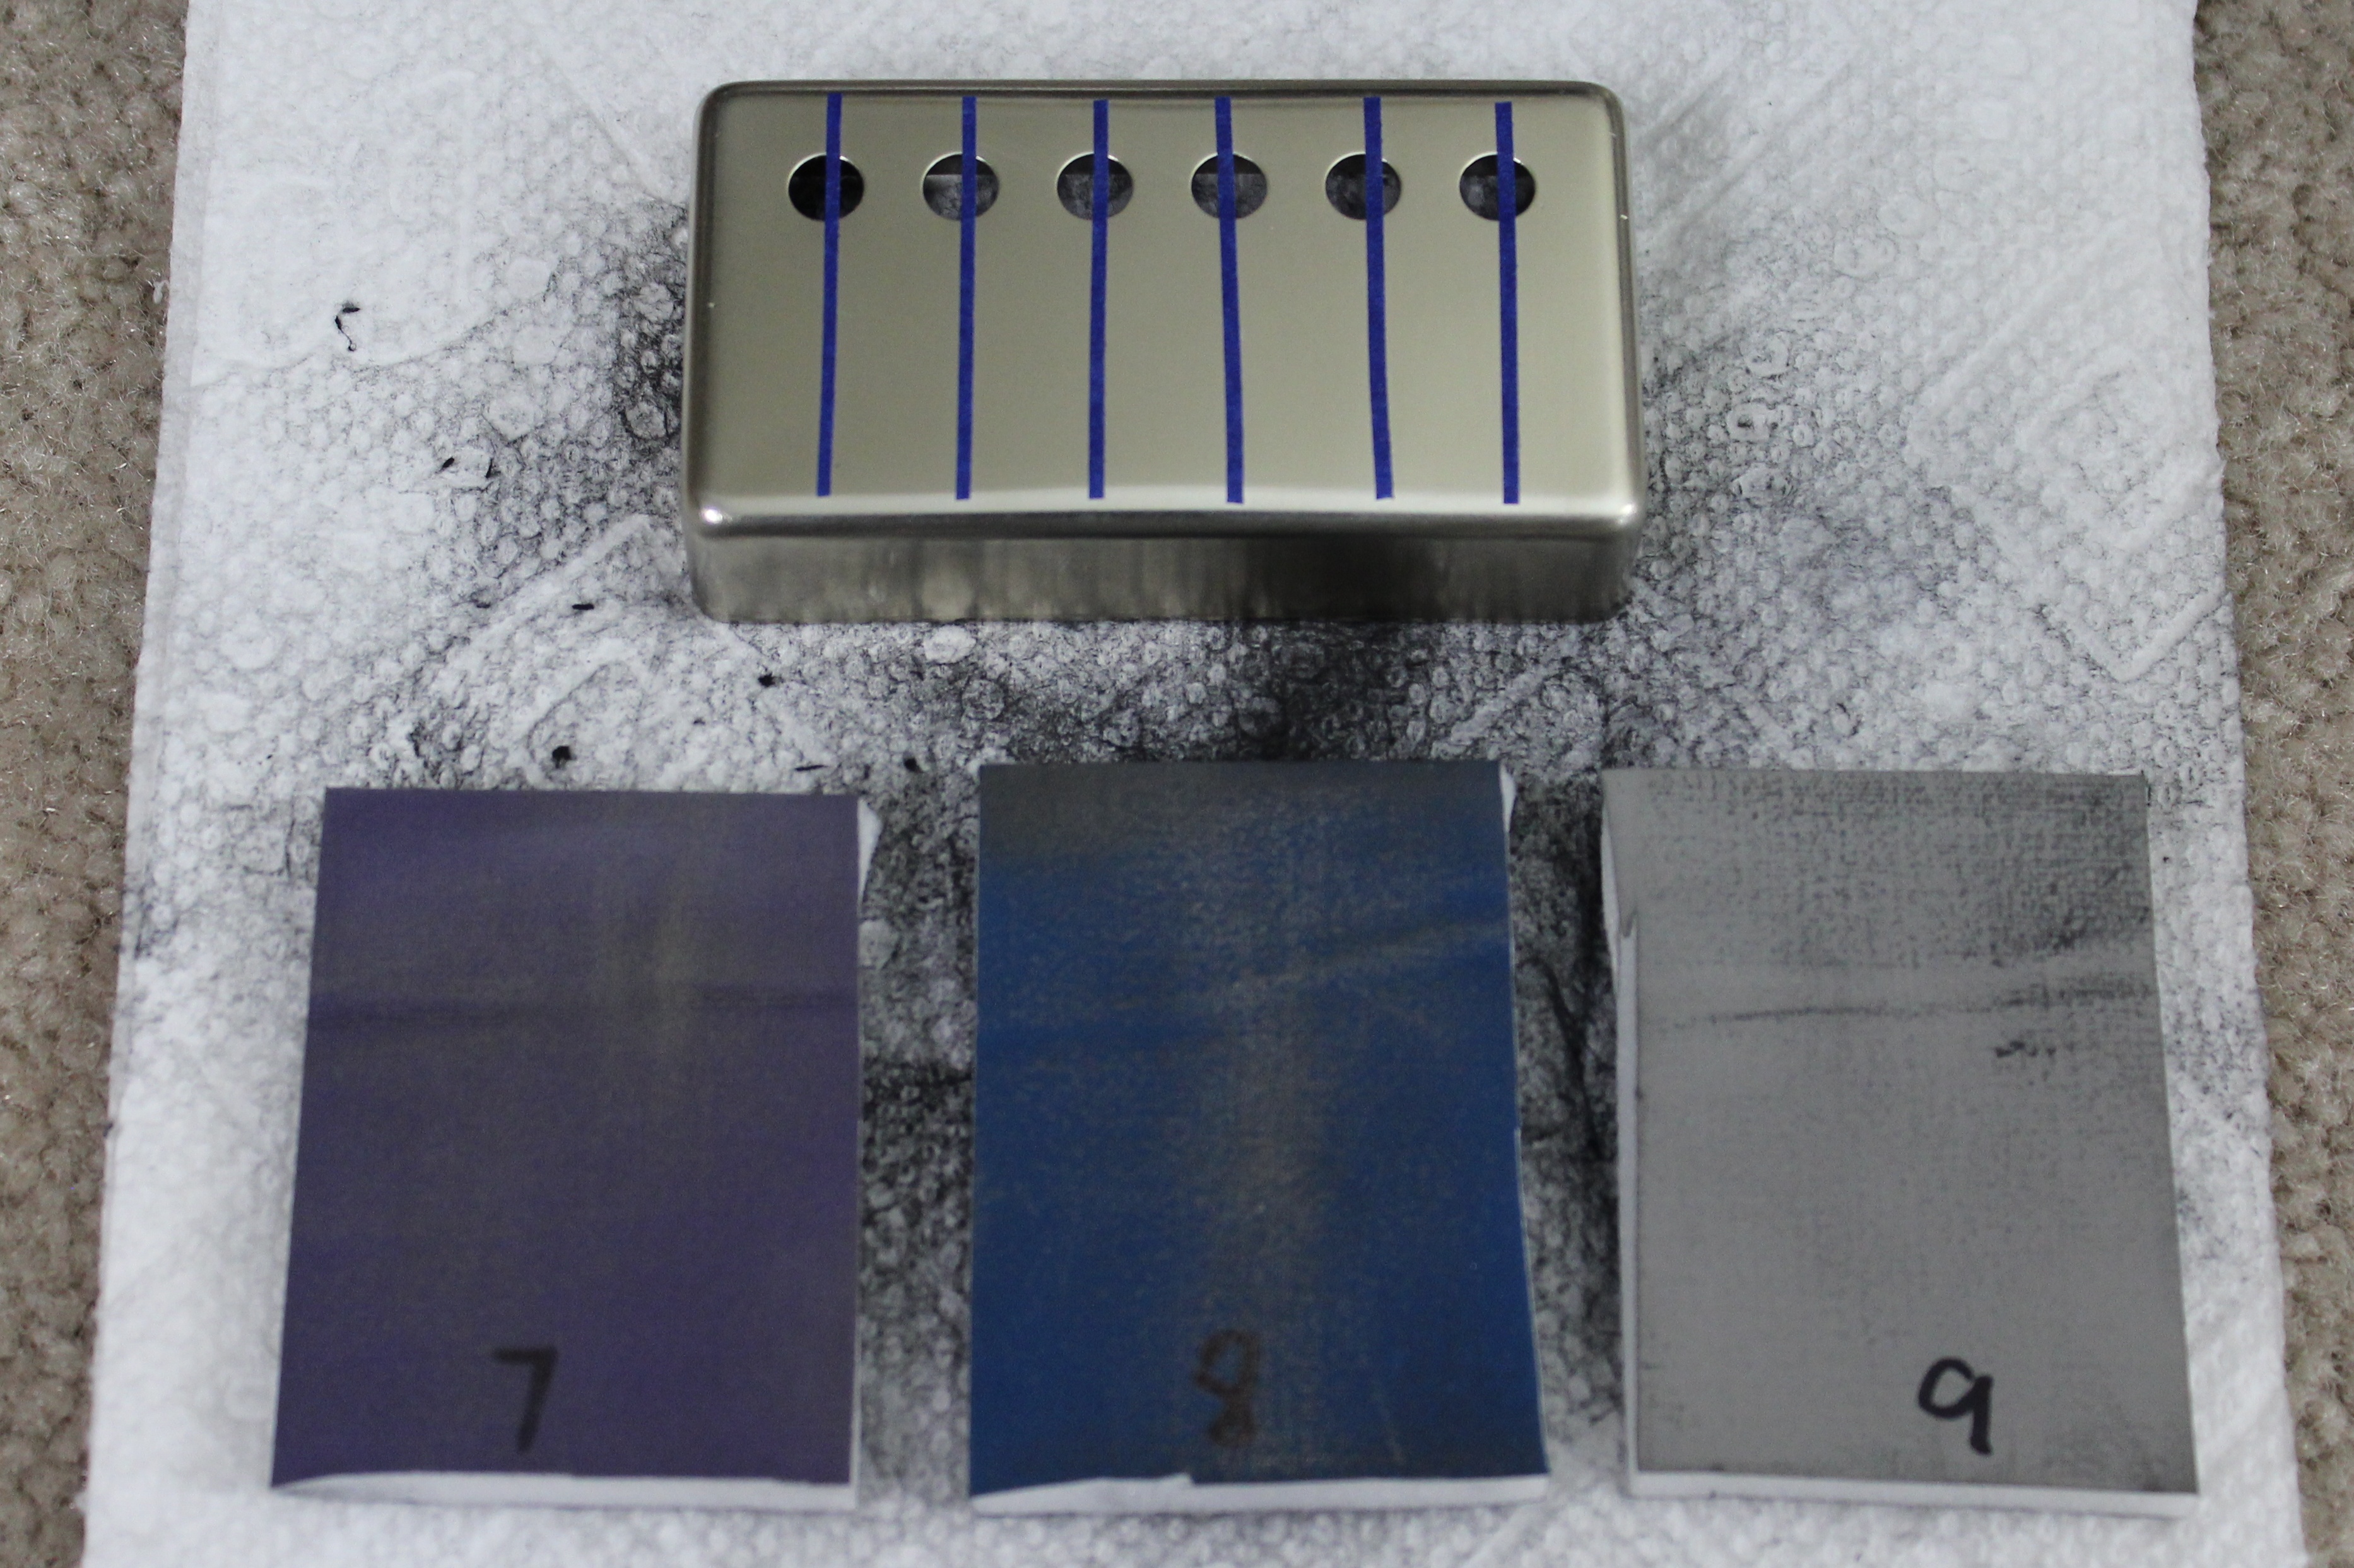
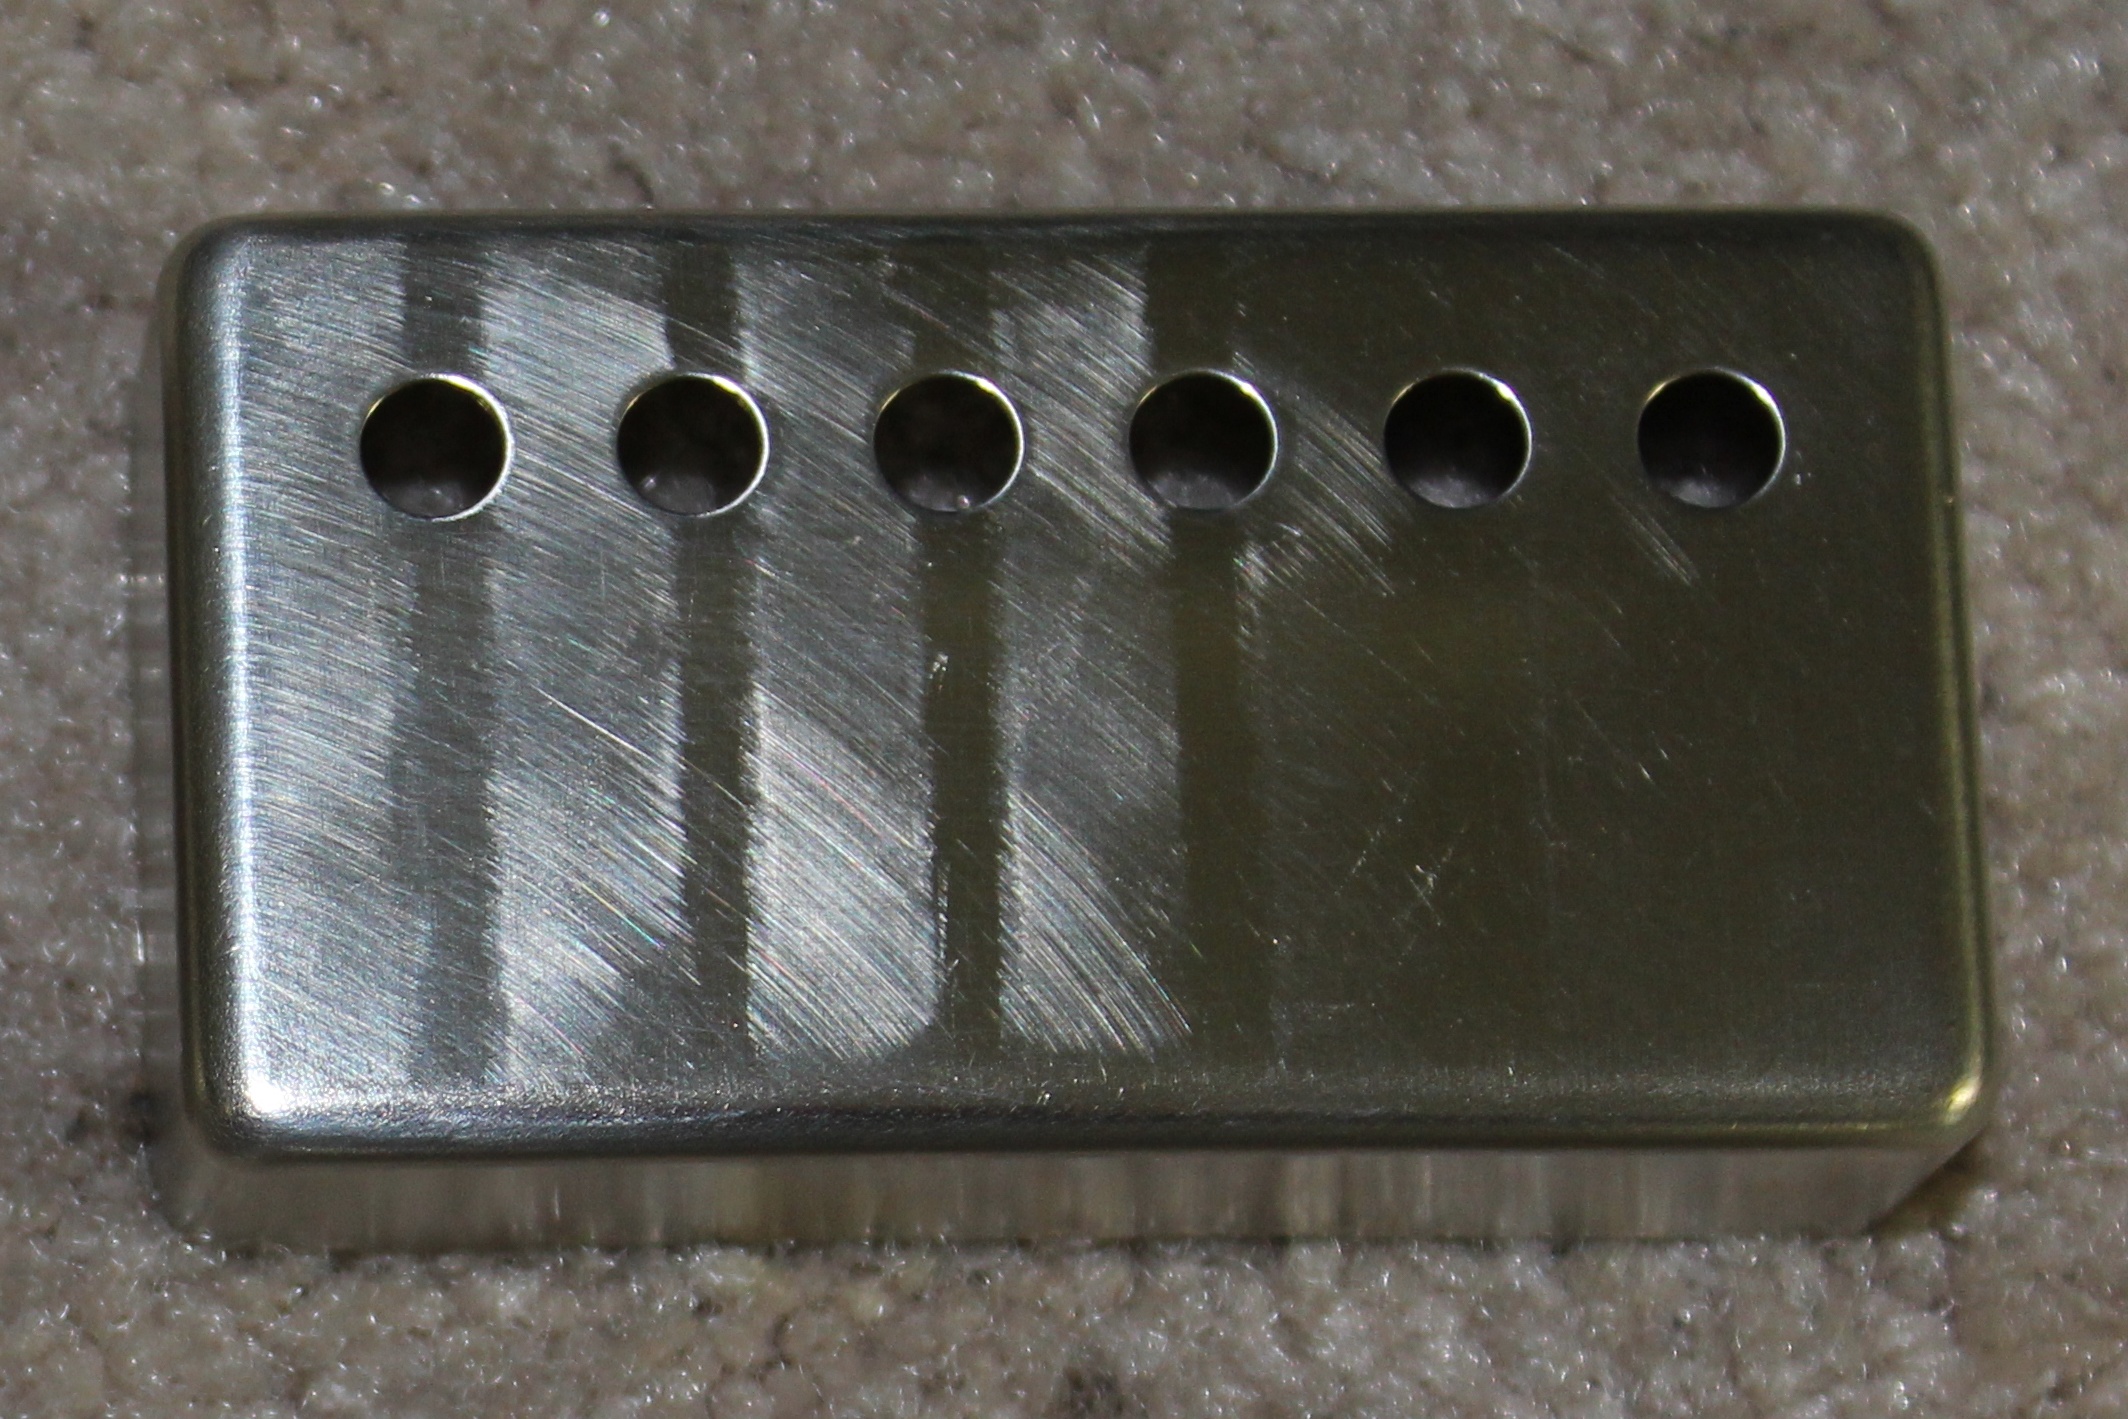
A very nice feature of the unplated pickup covers is that their look can easily be changed with very little work.  You could go with the raw look, as shown above.

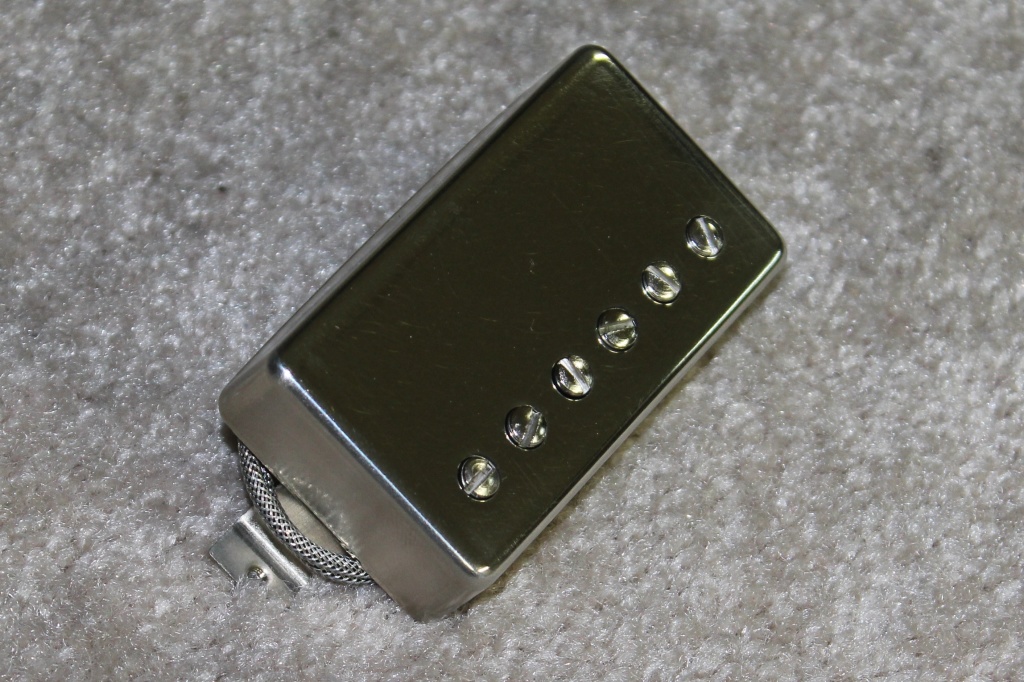
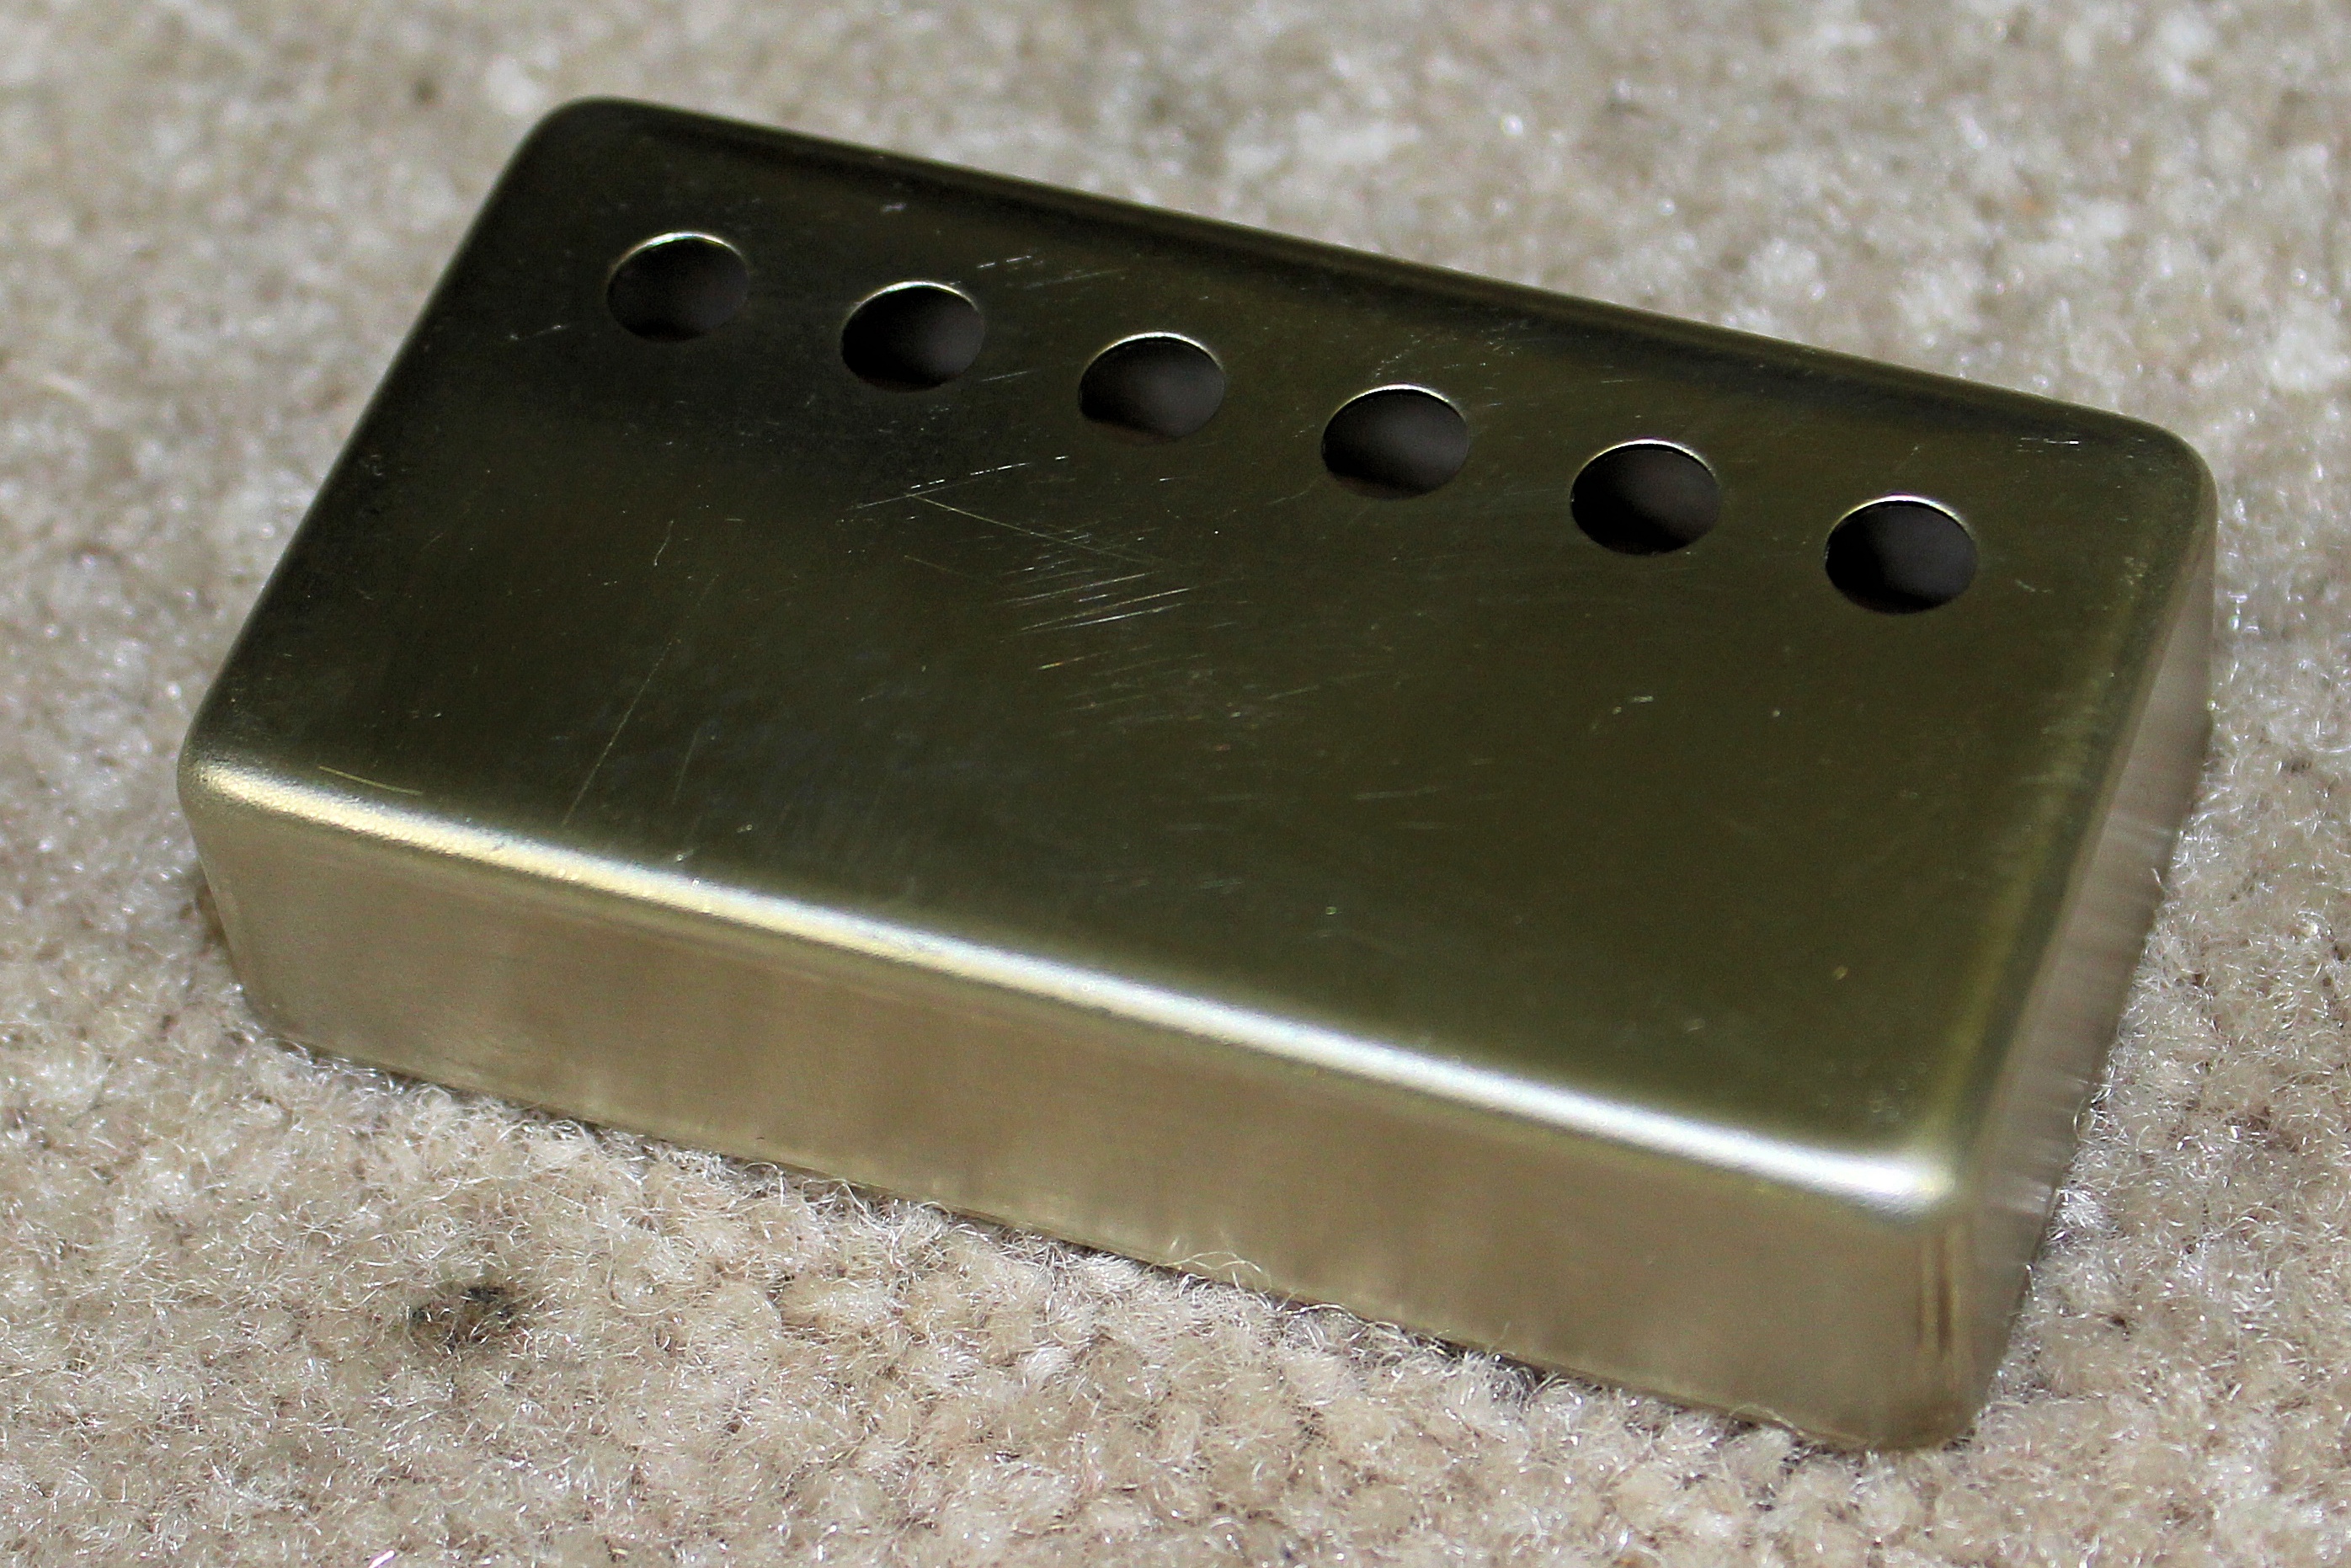
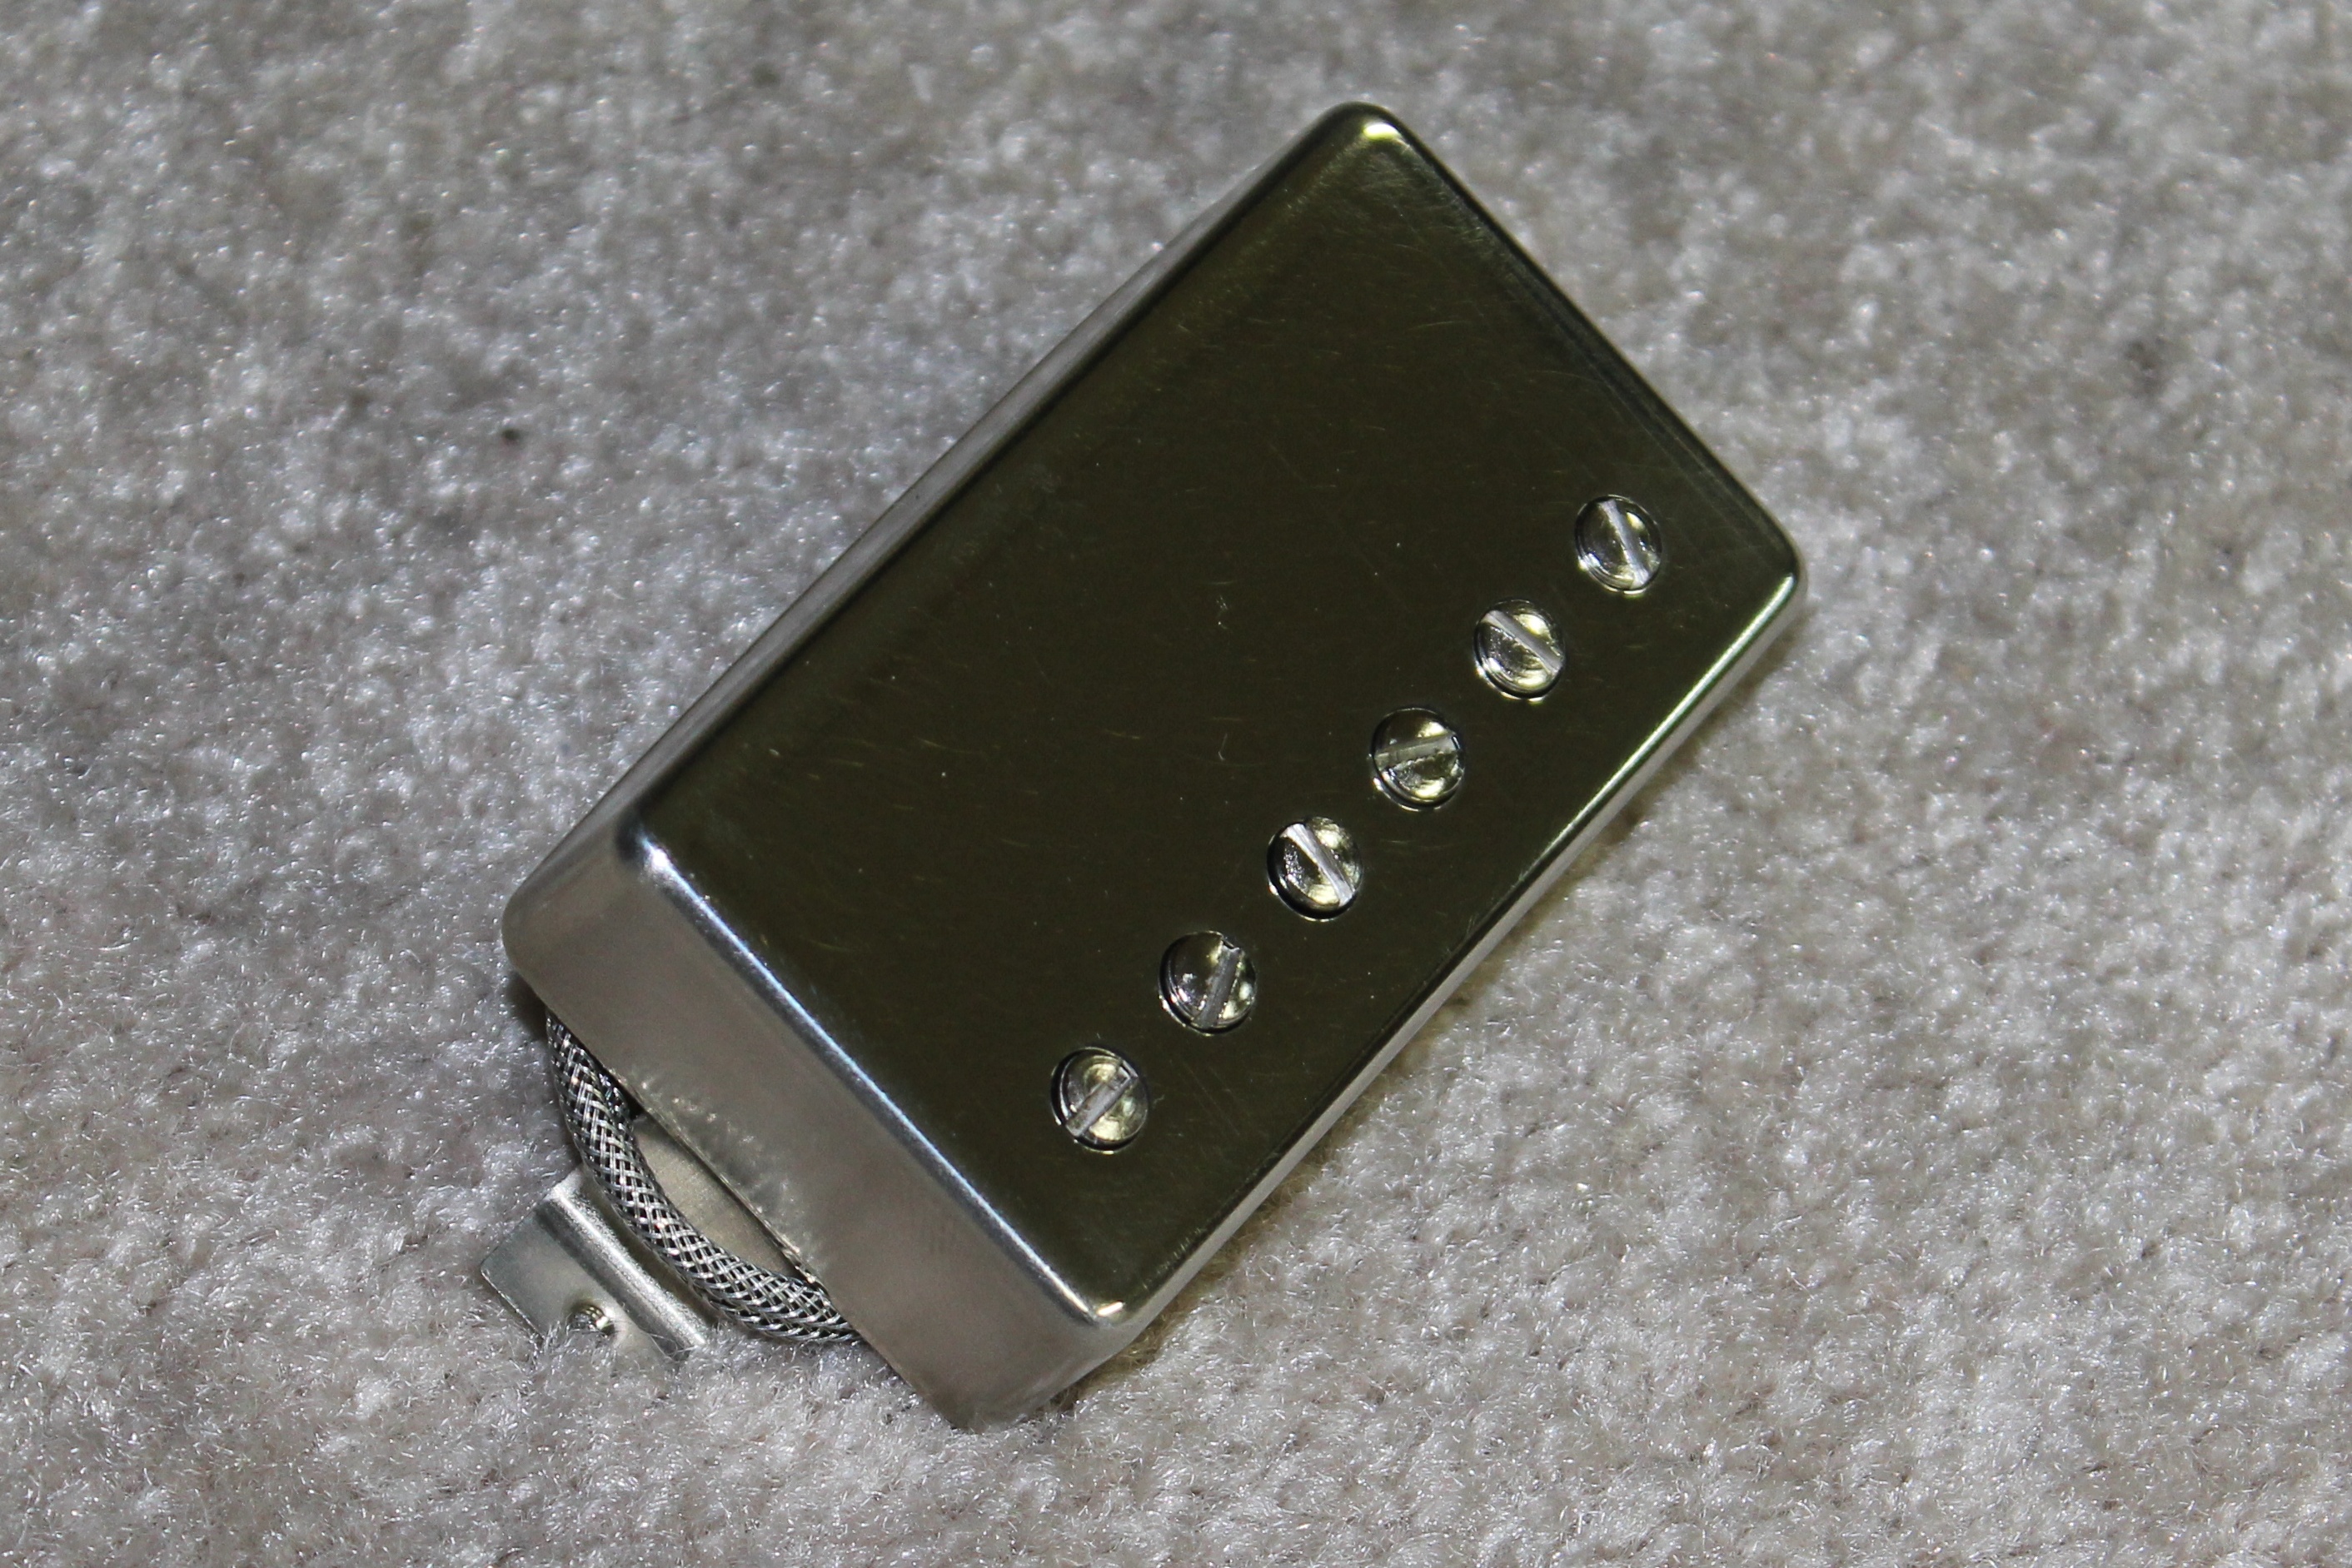
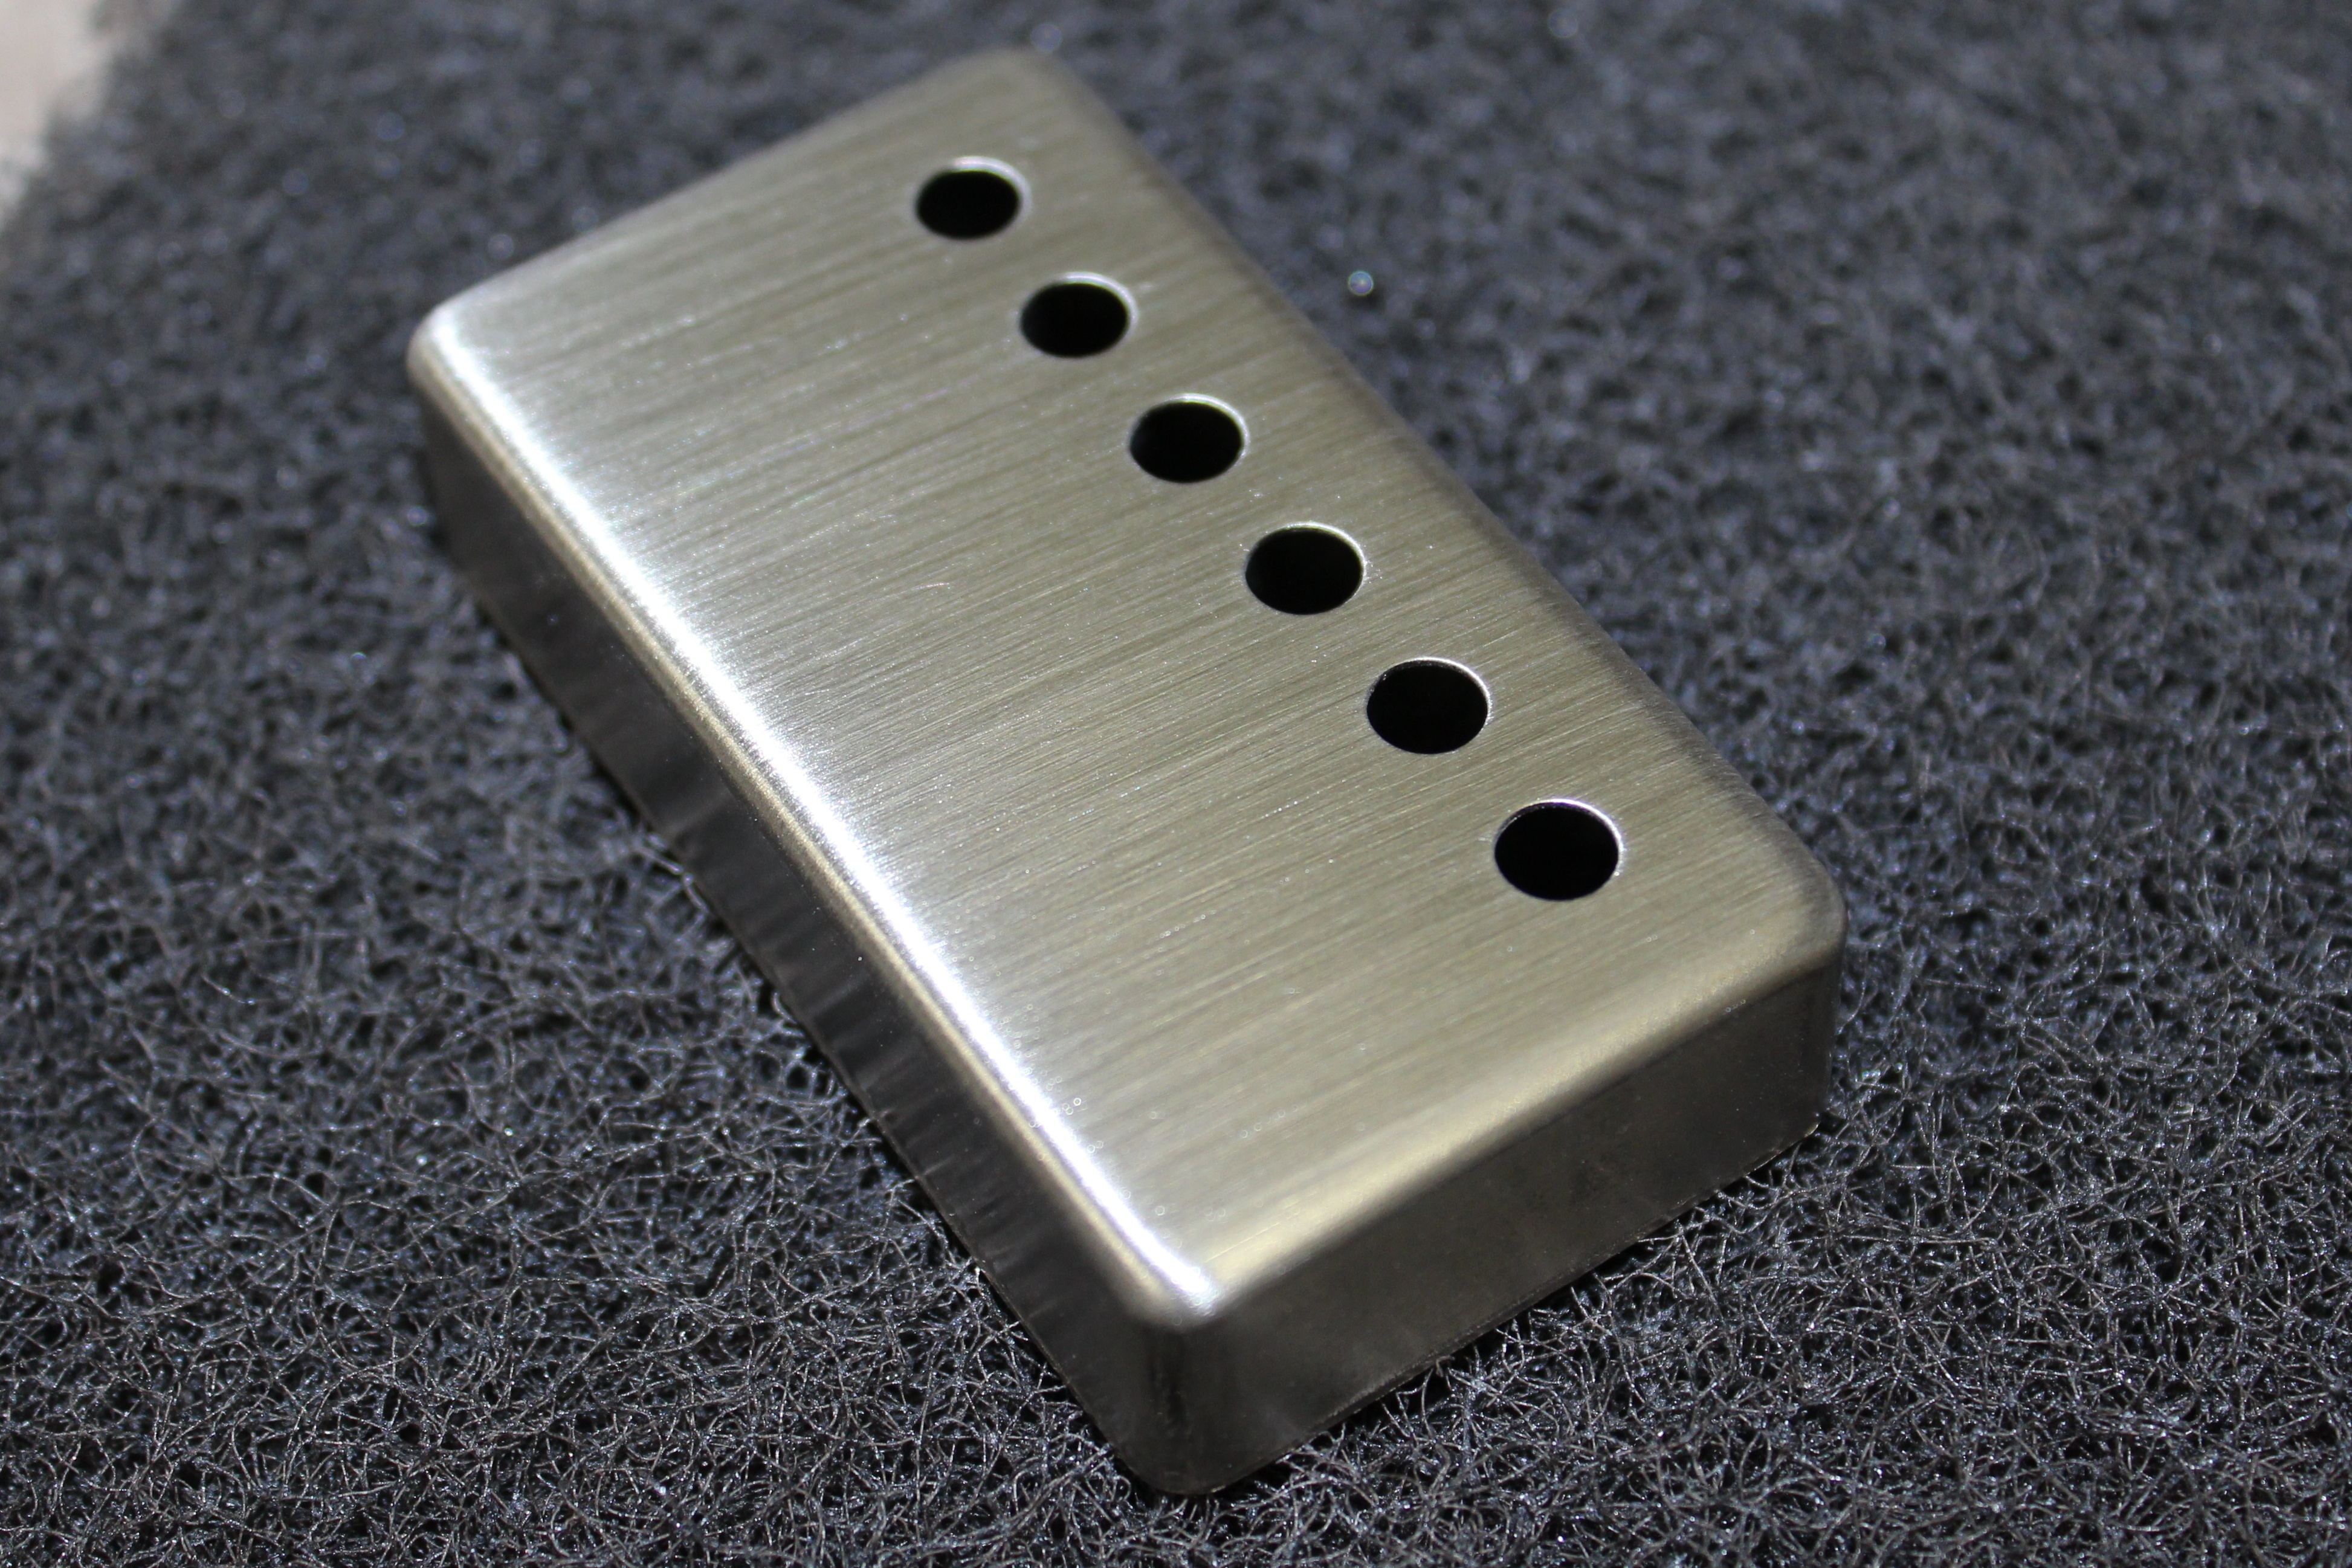
Or maybe the brushed metal look: Brushed look unplated pickup finish
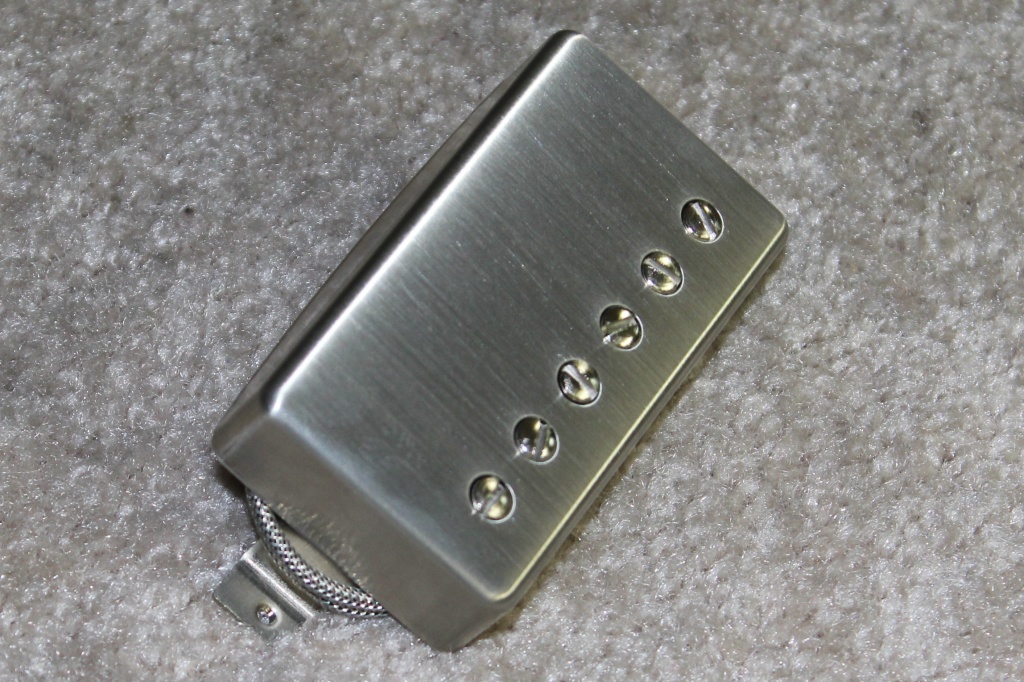
A hand polished look:

Polished unplated pickup finish
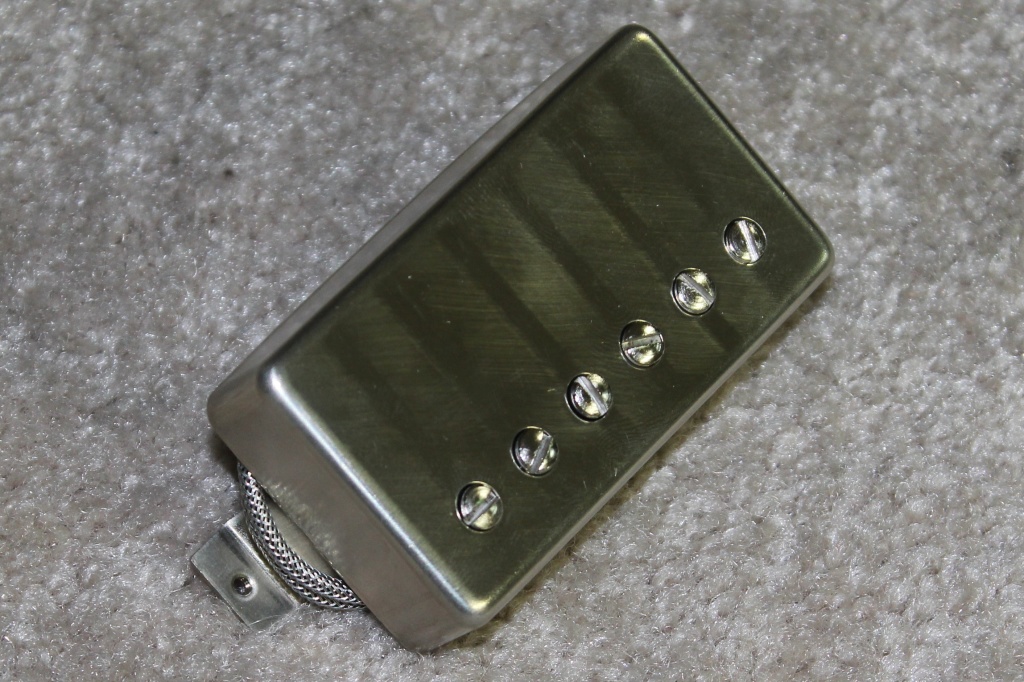
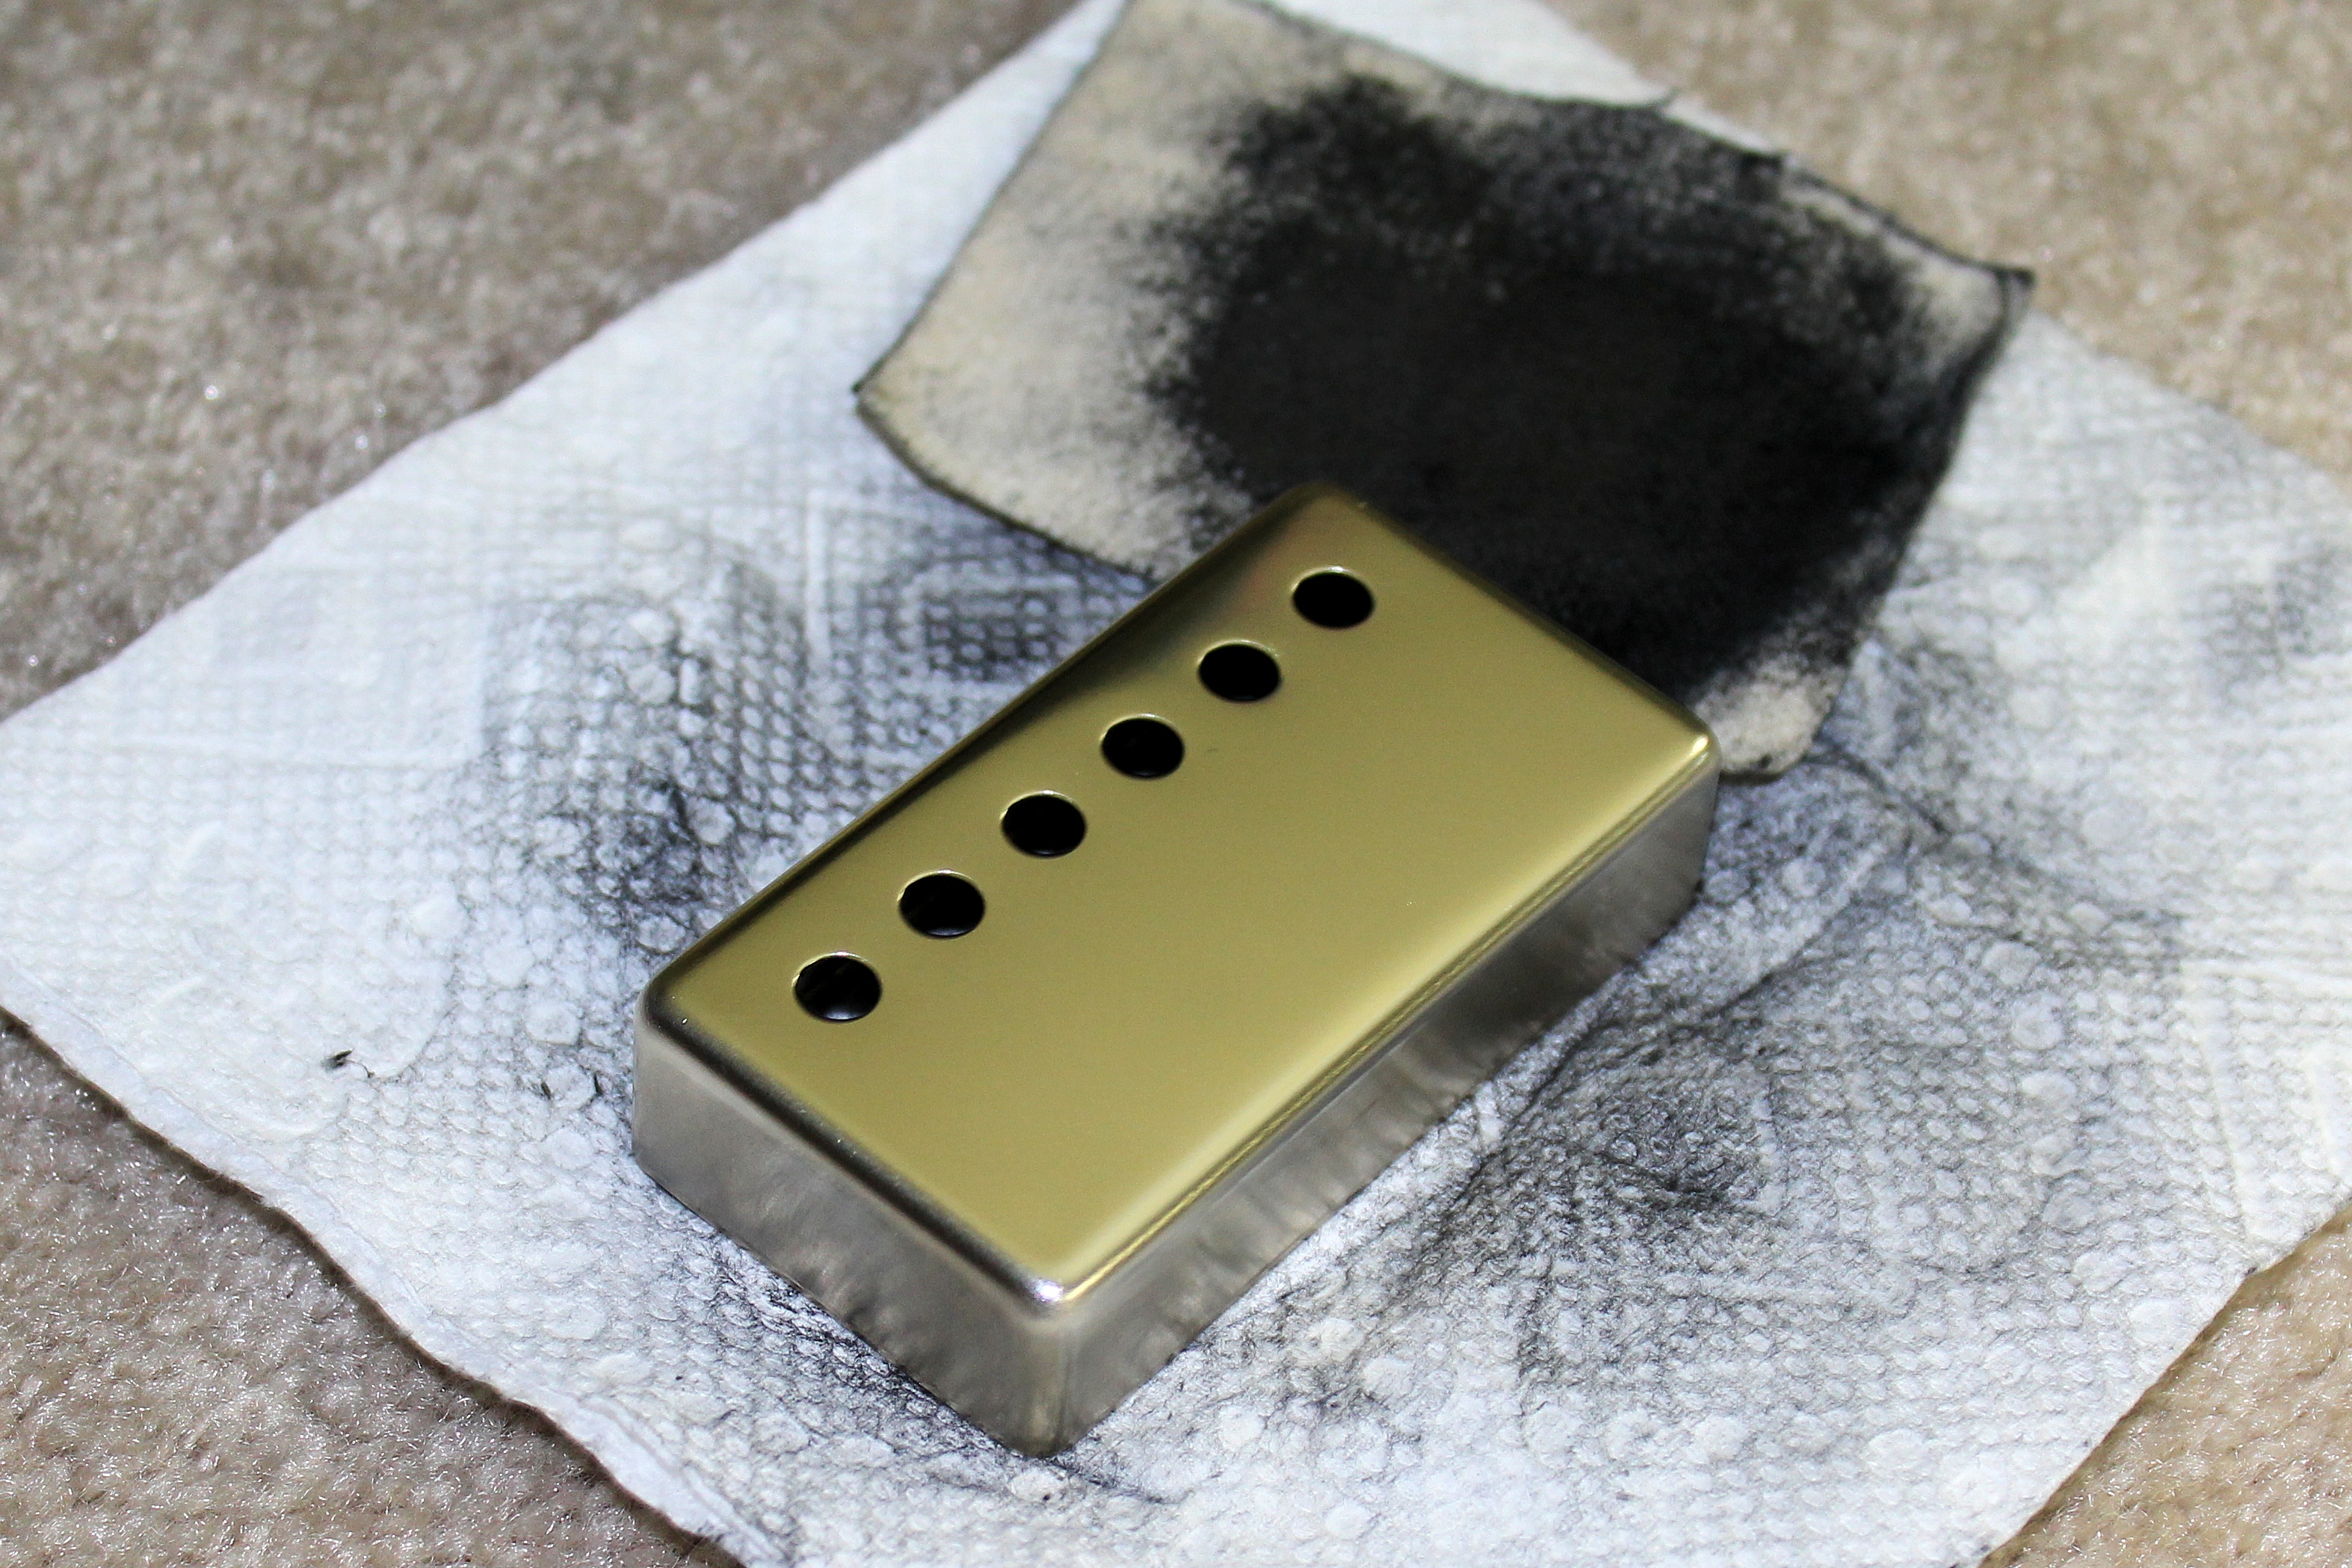
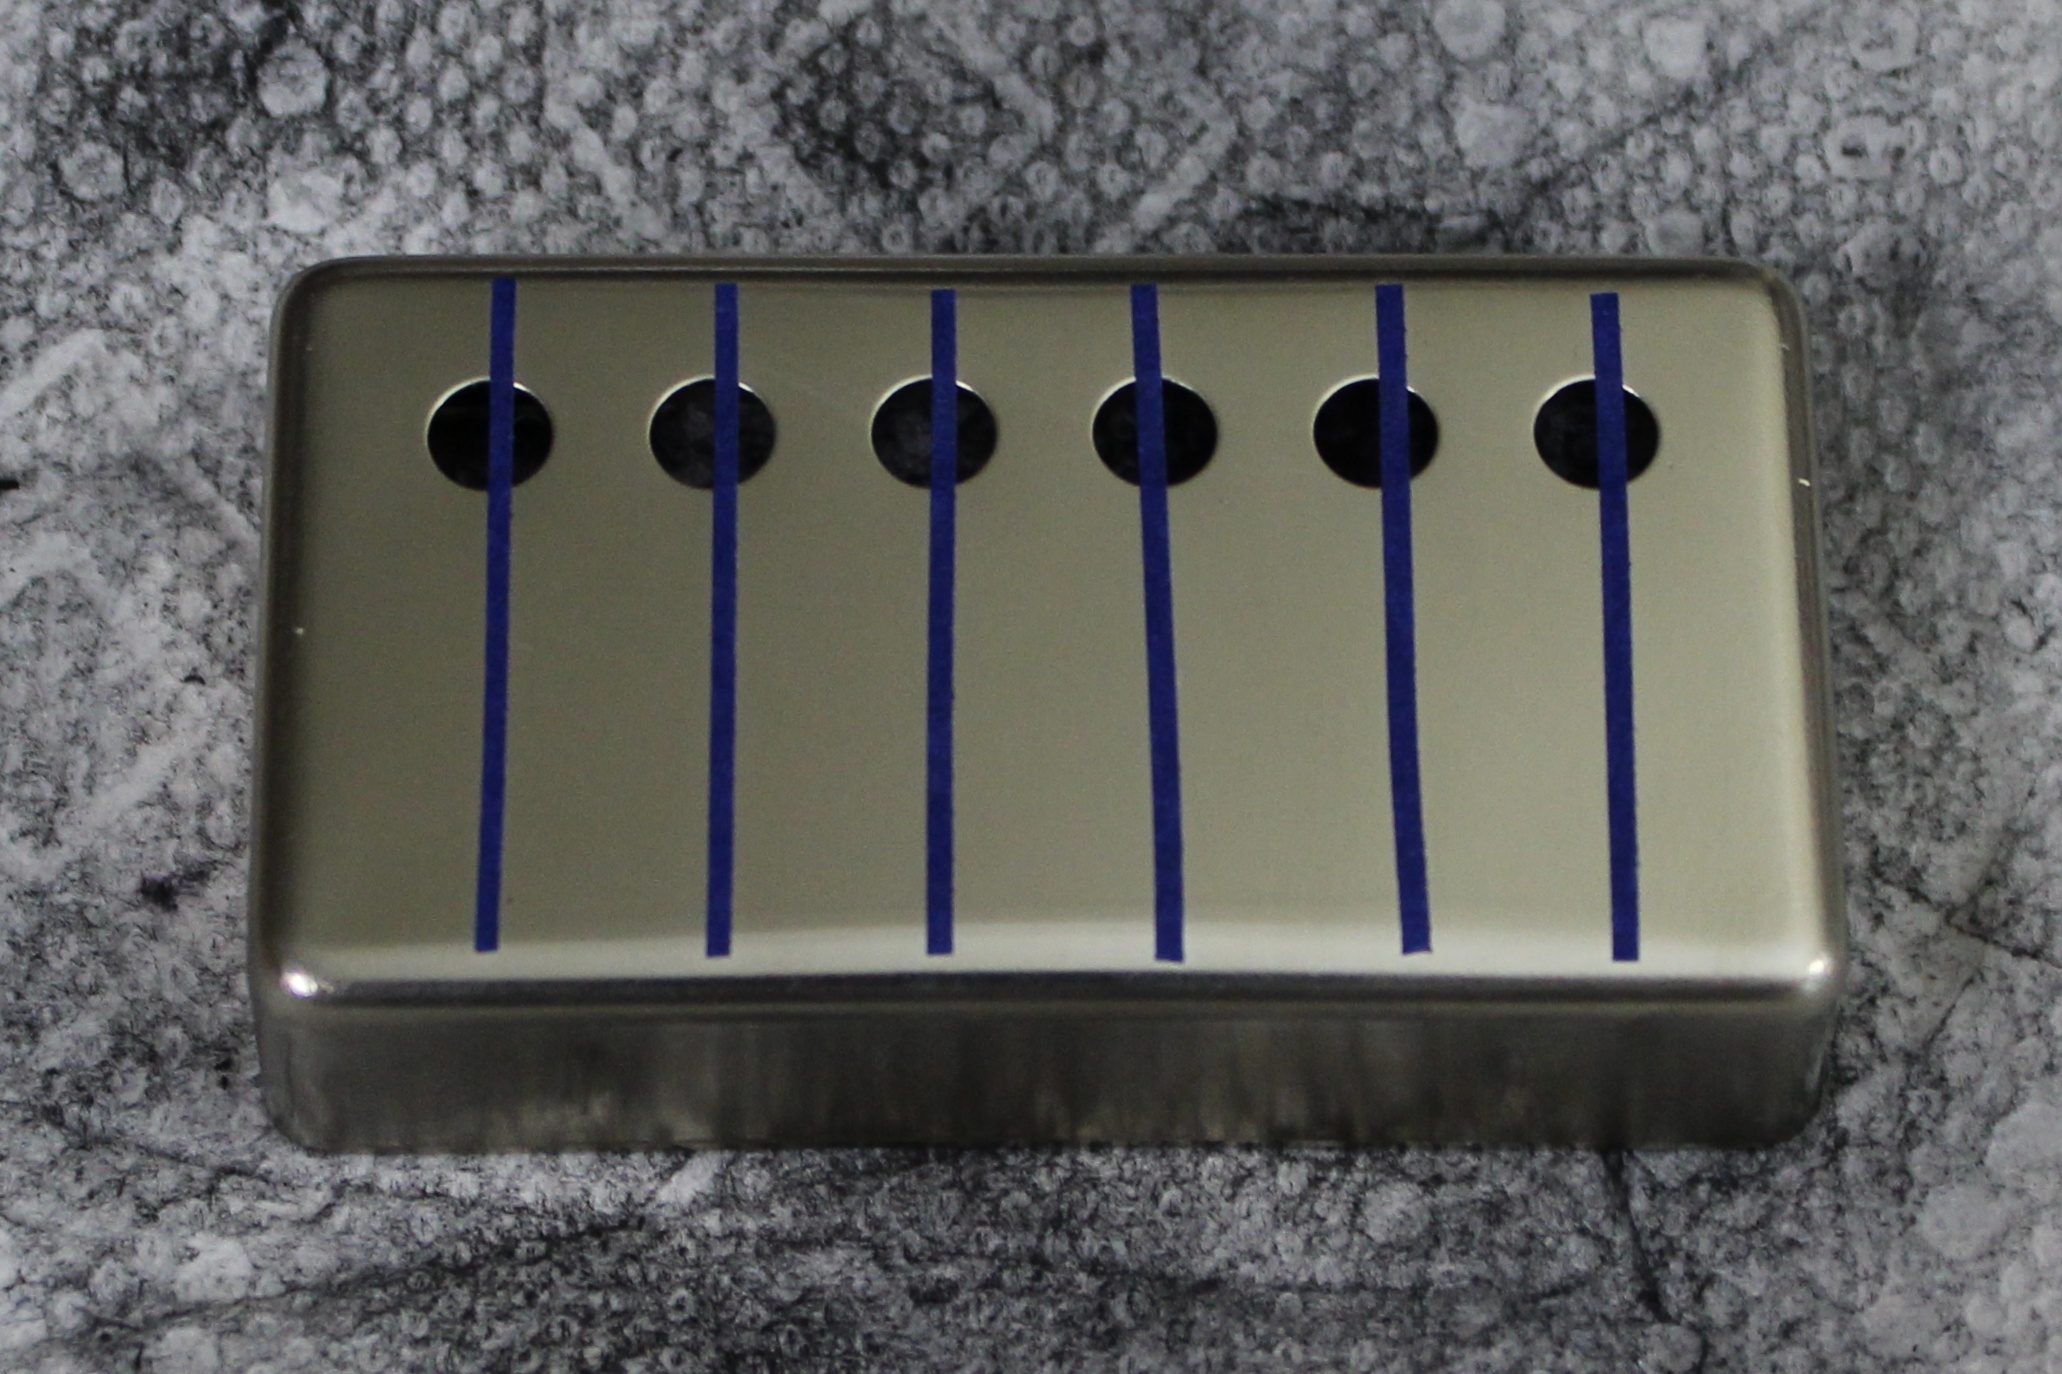
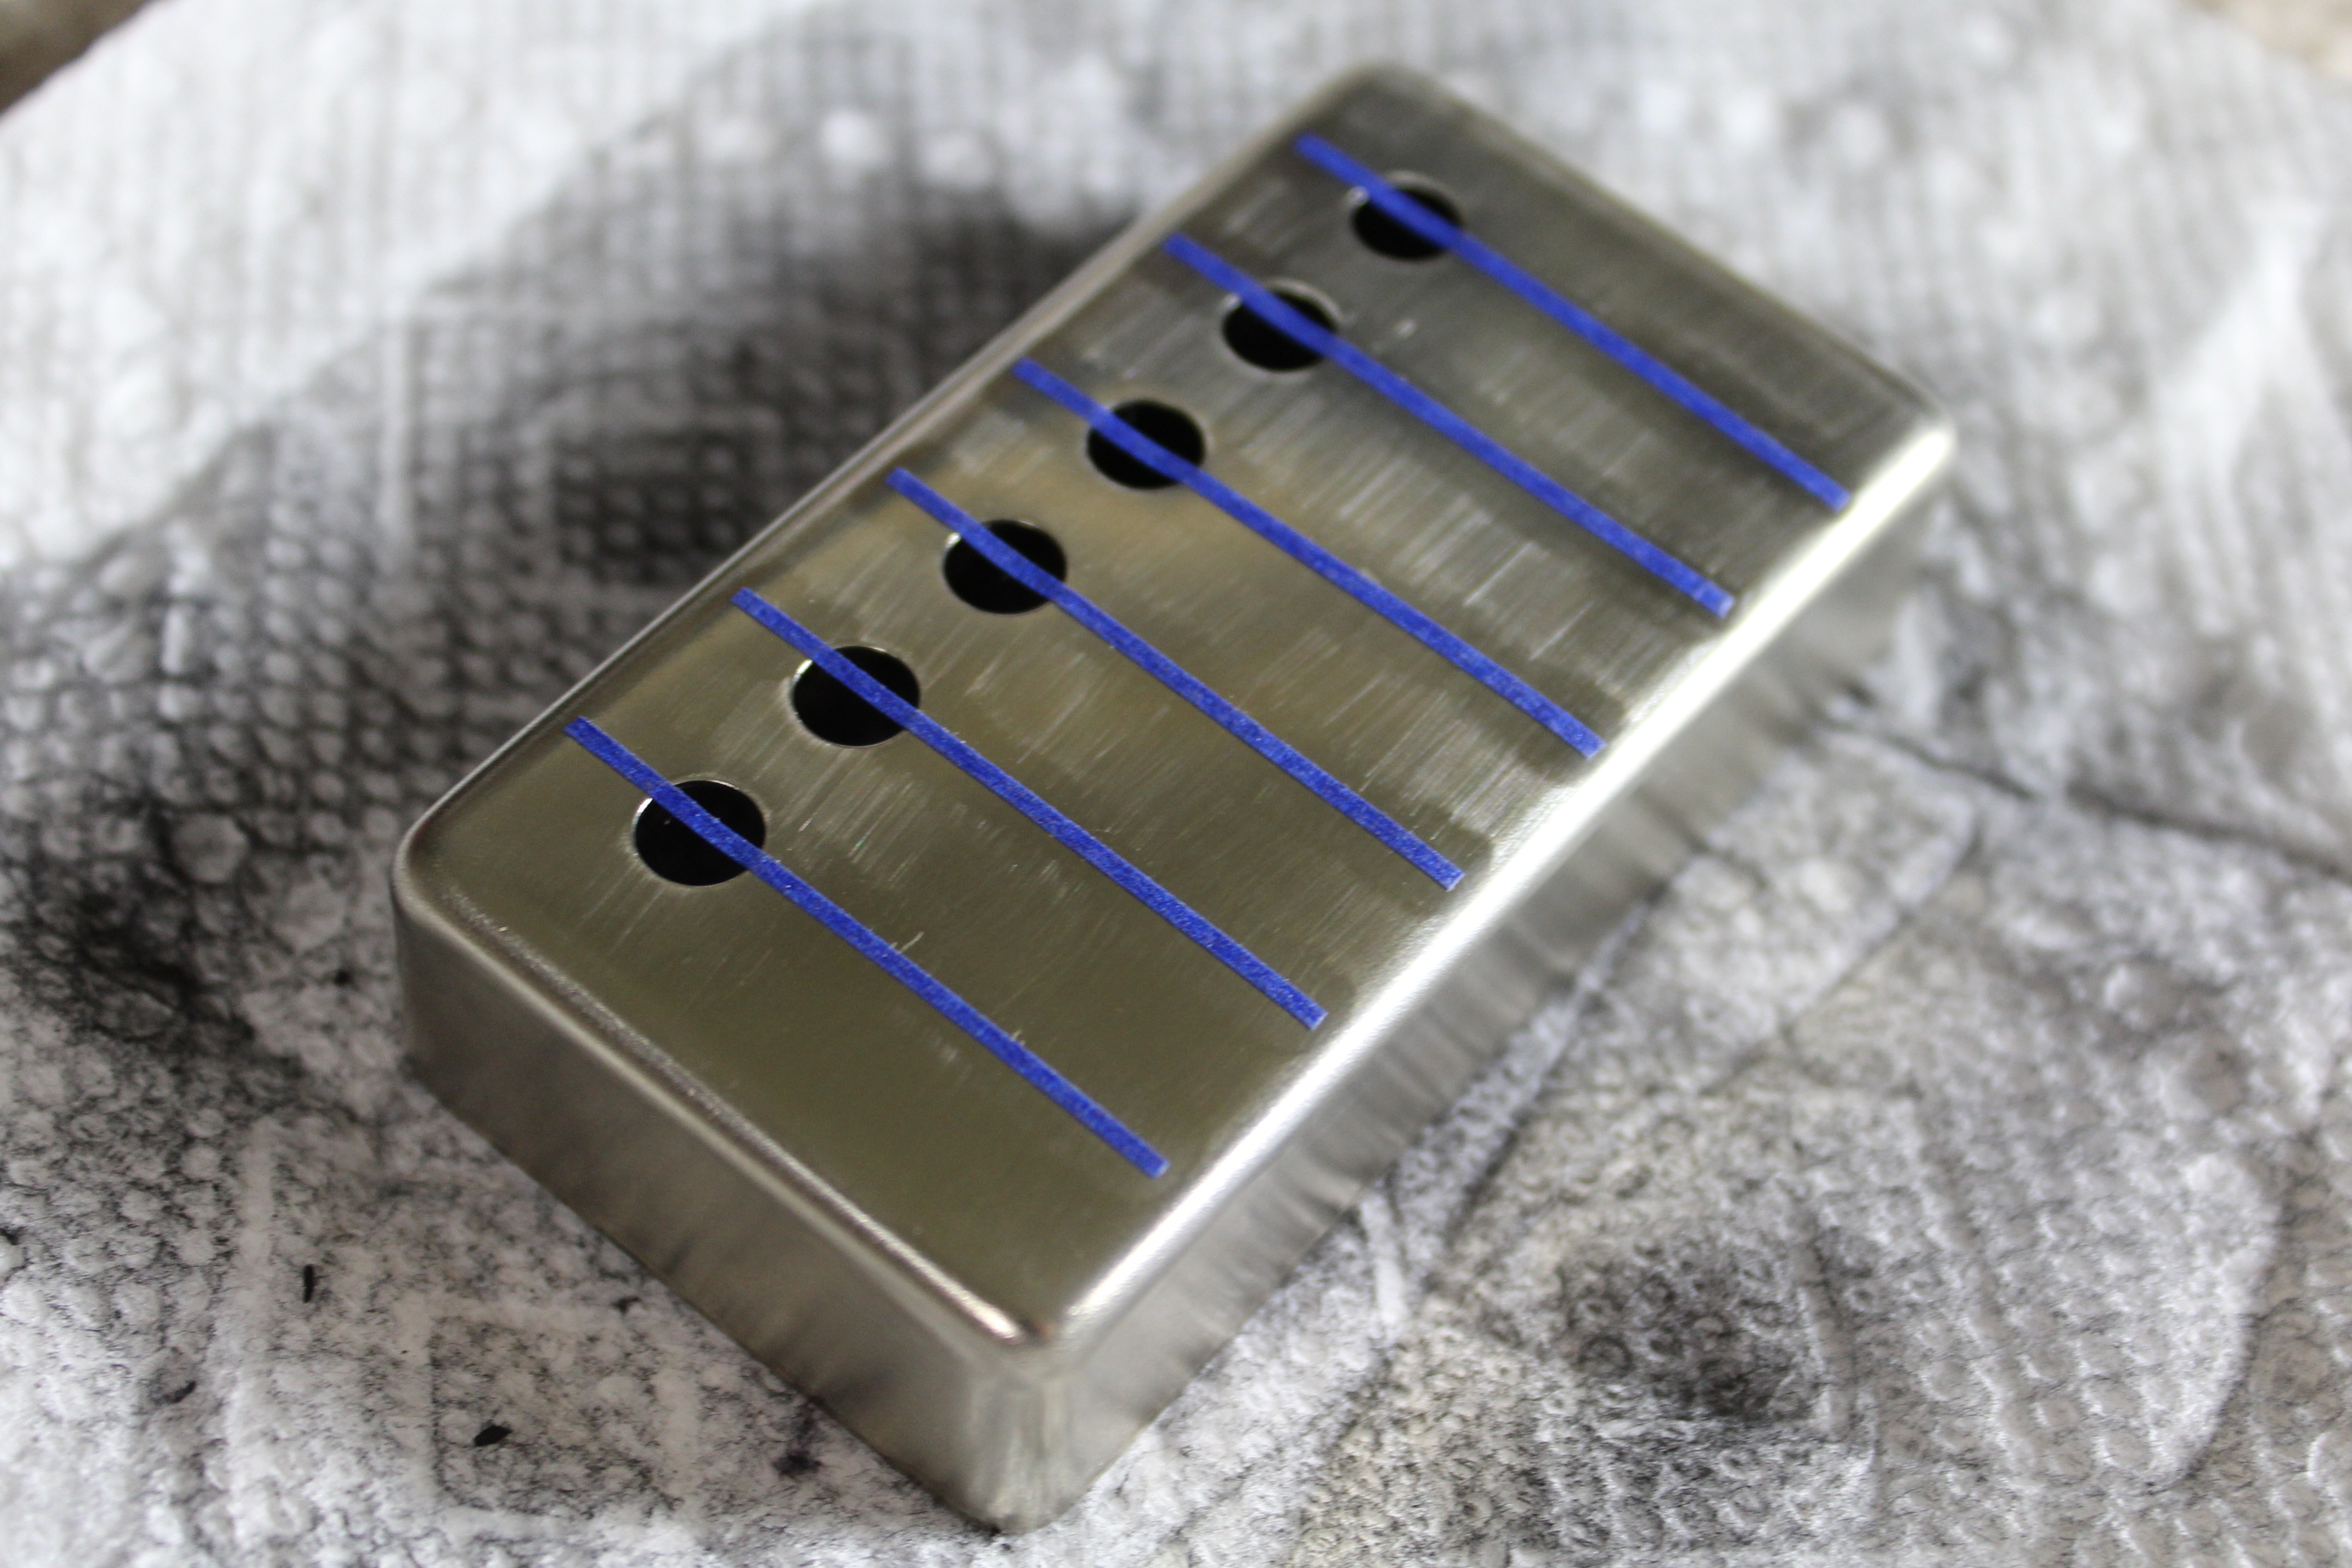
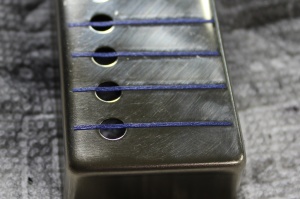
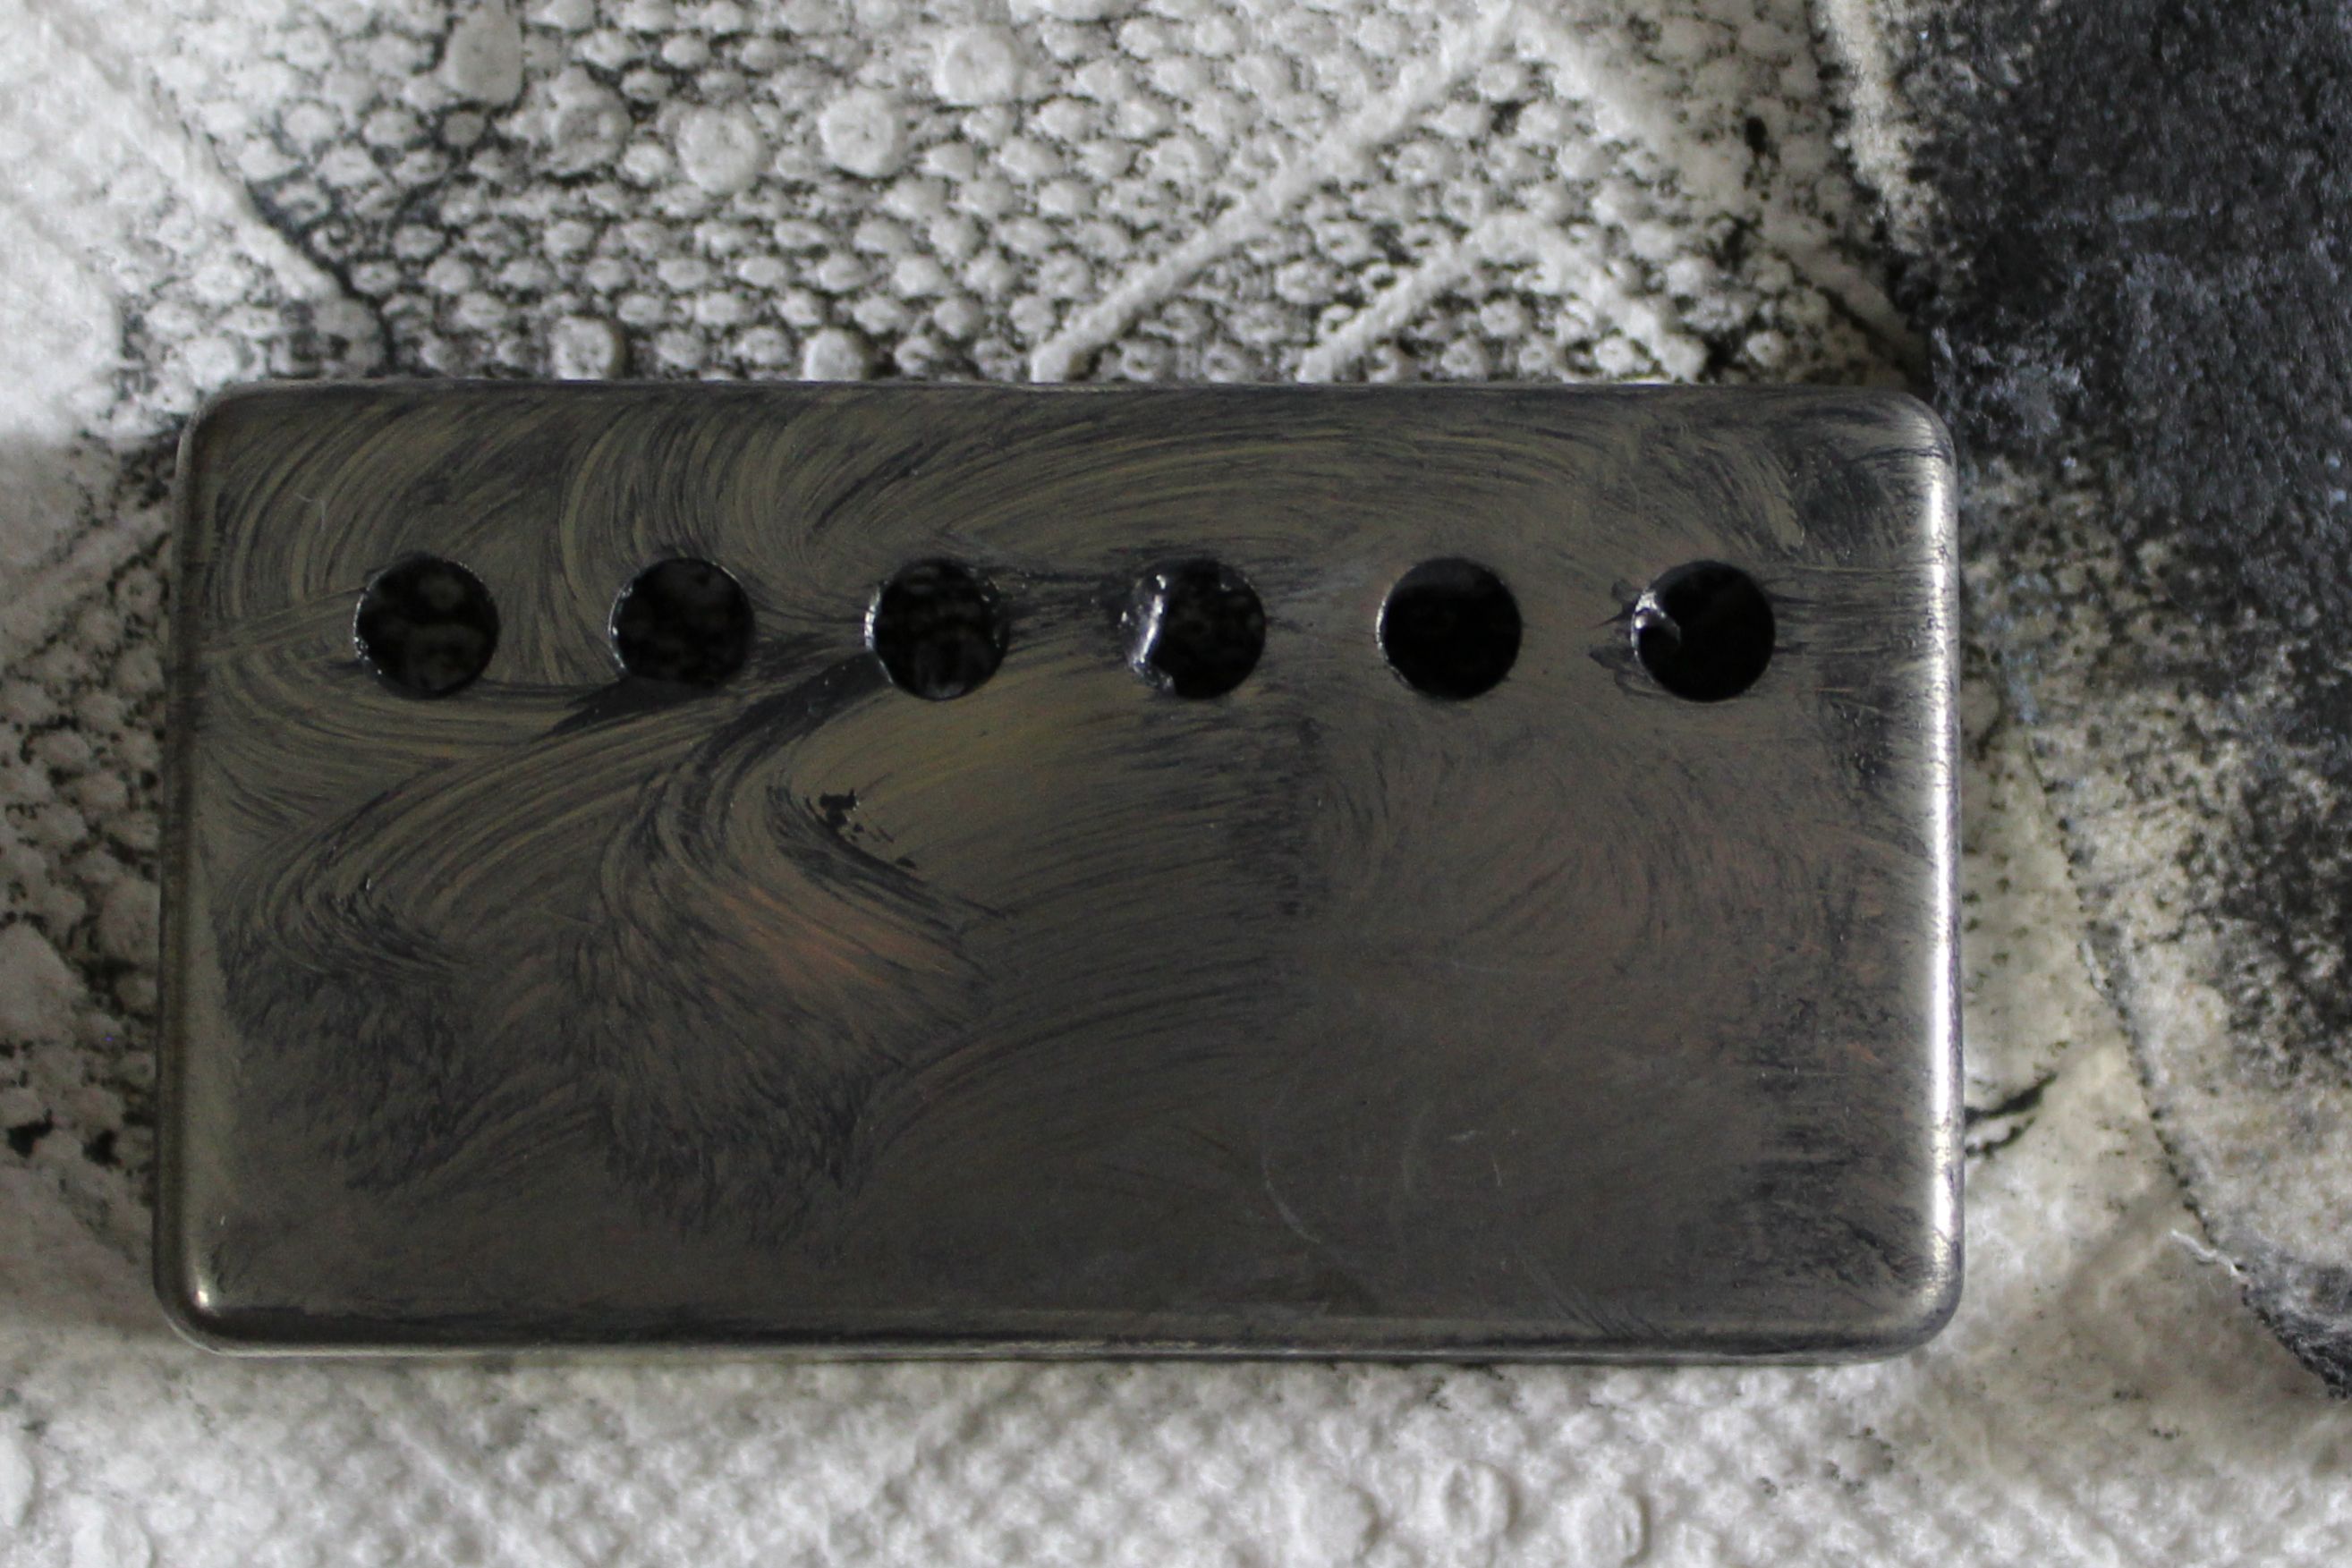
or the aged look with string line:

String Lines finishedEach one of these looks can easily be achieved with less than 30 minutes of work.

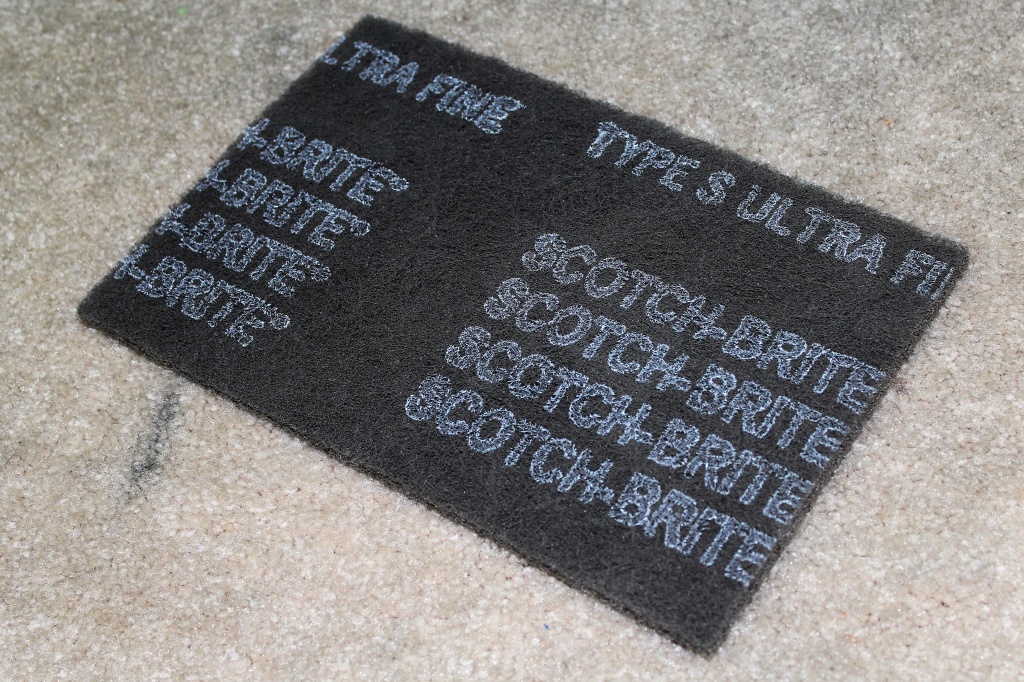
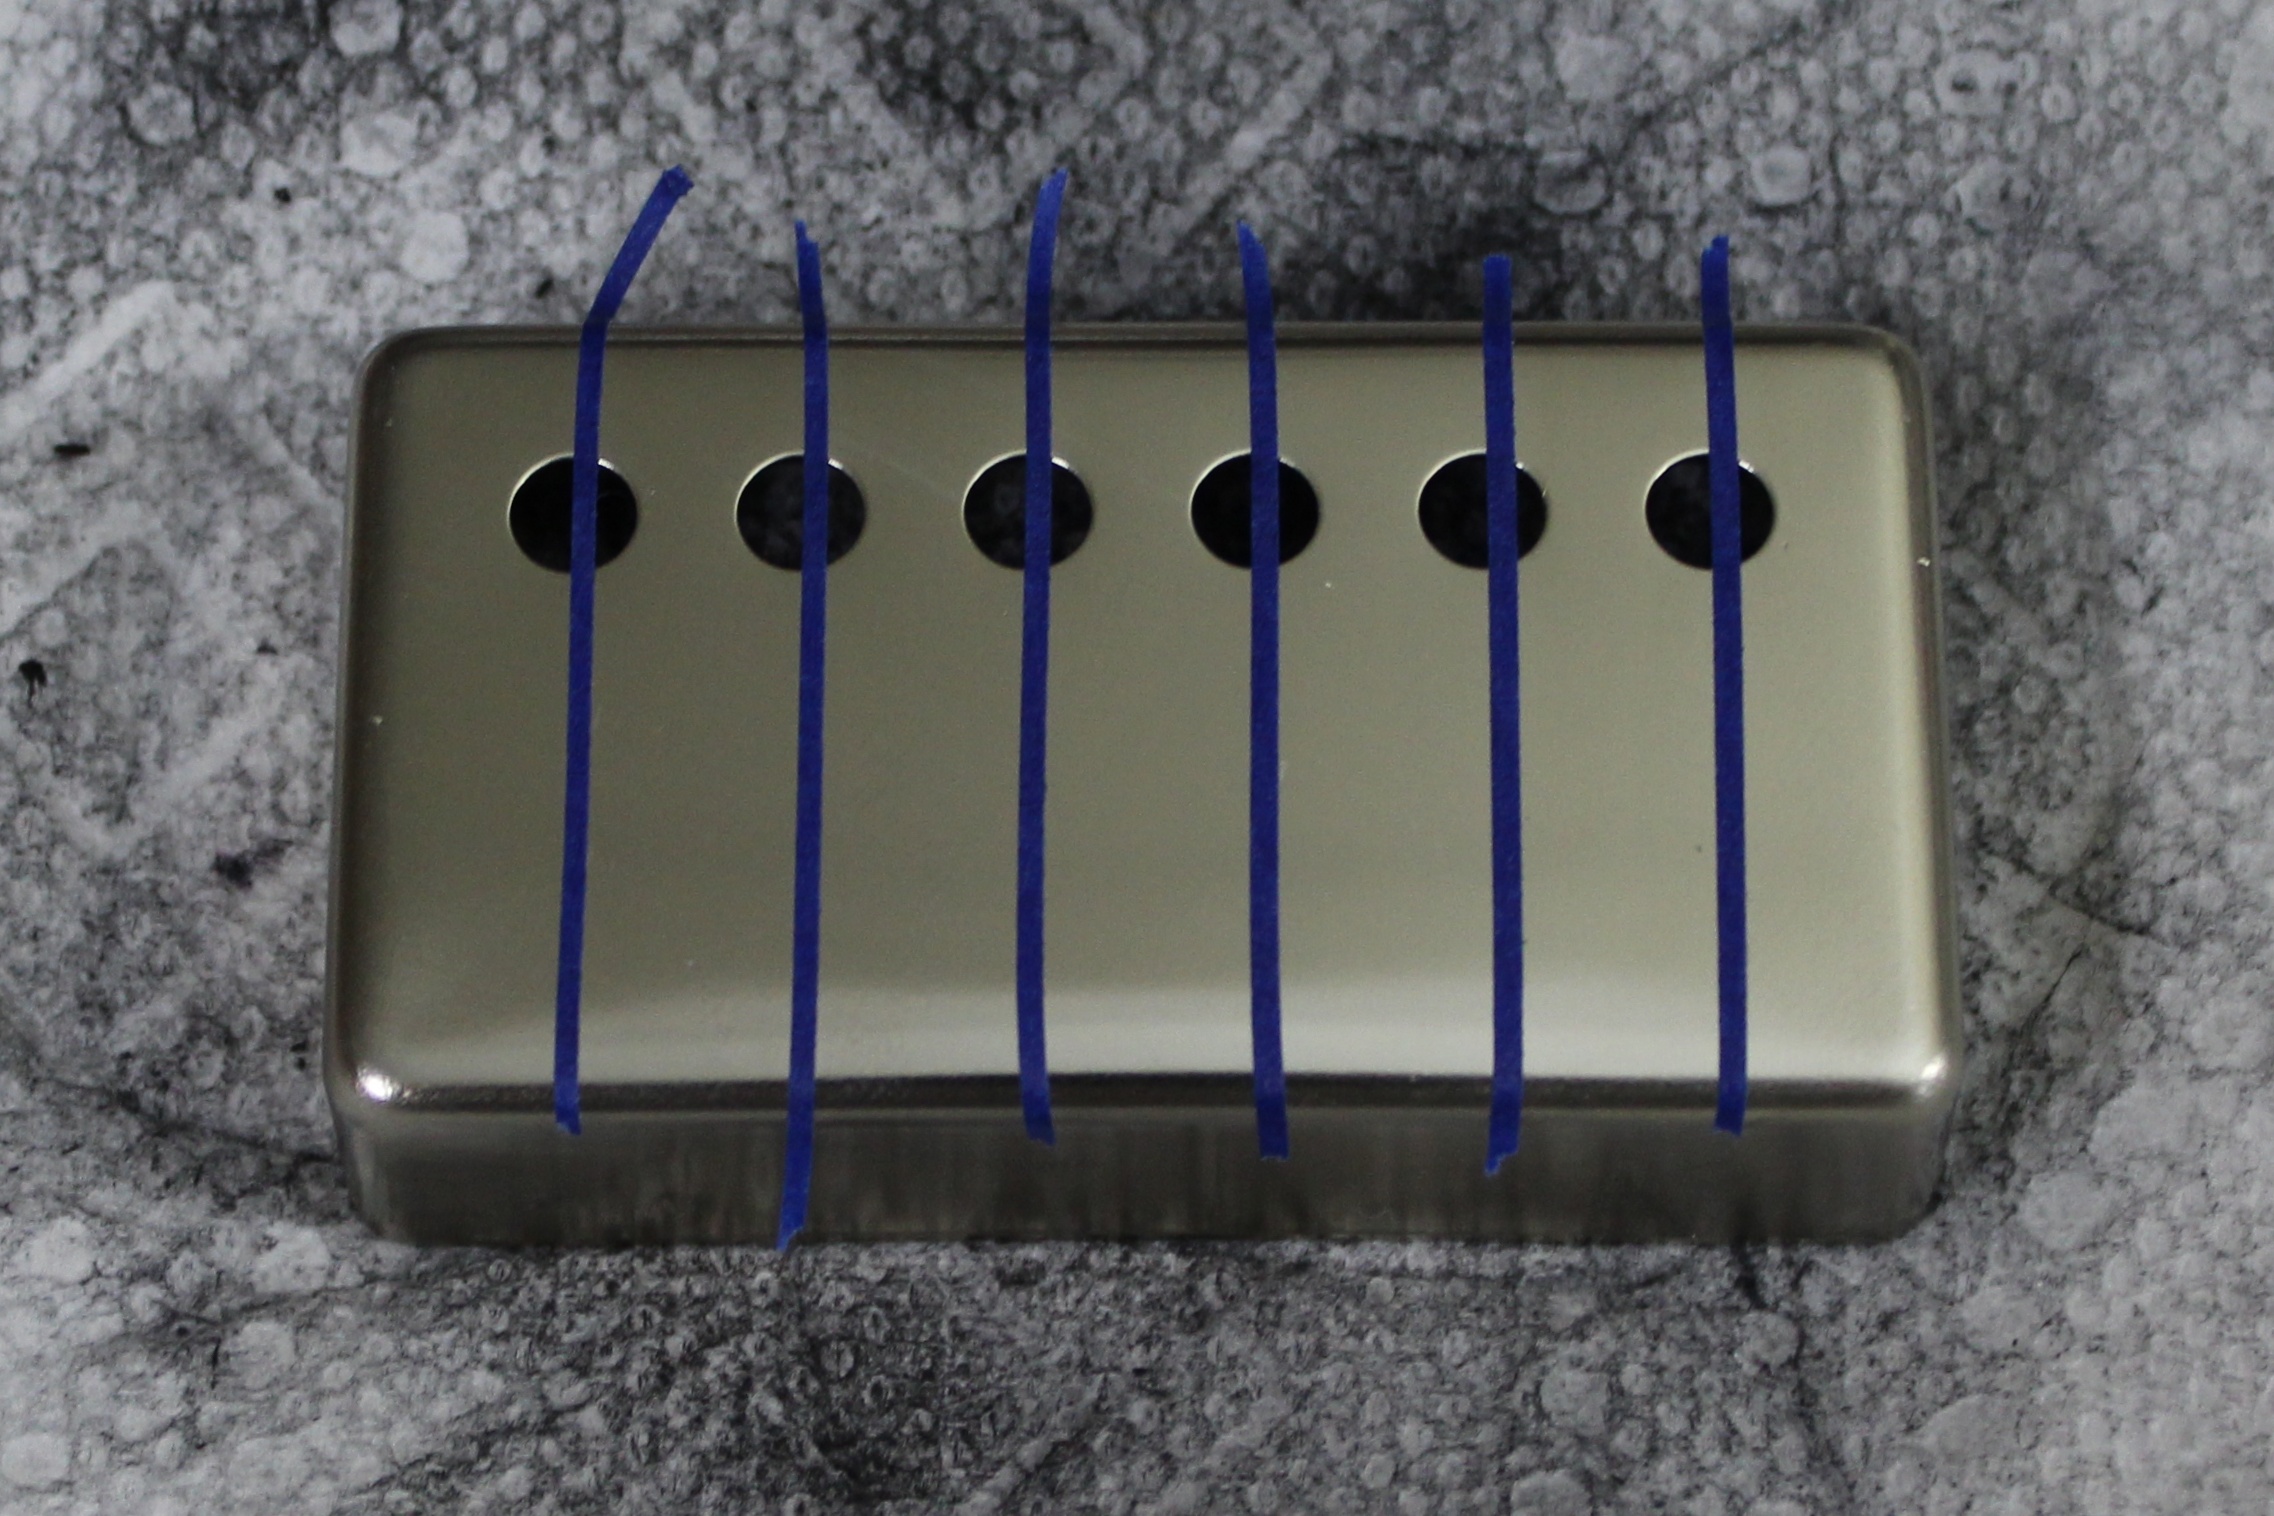
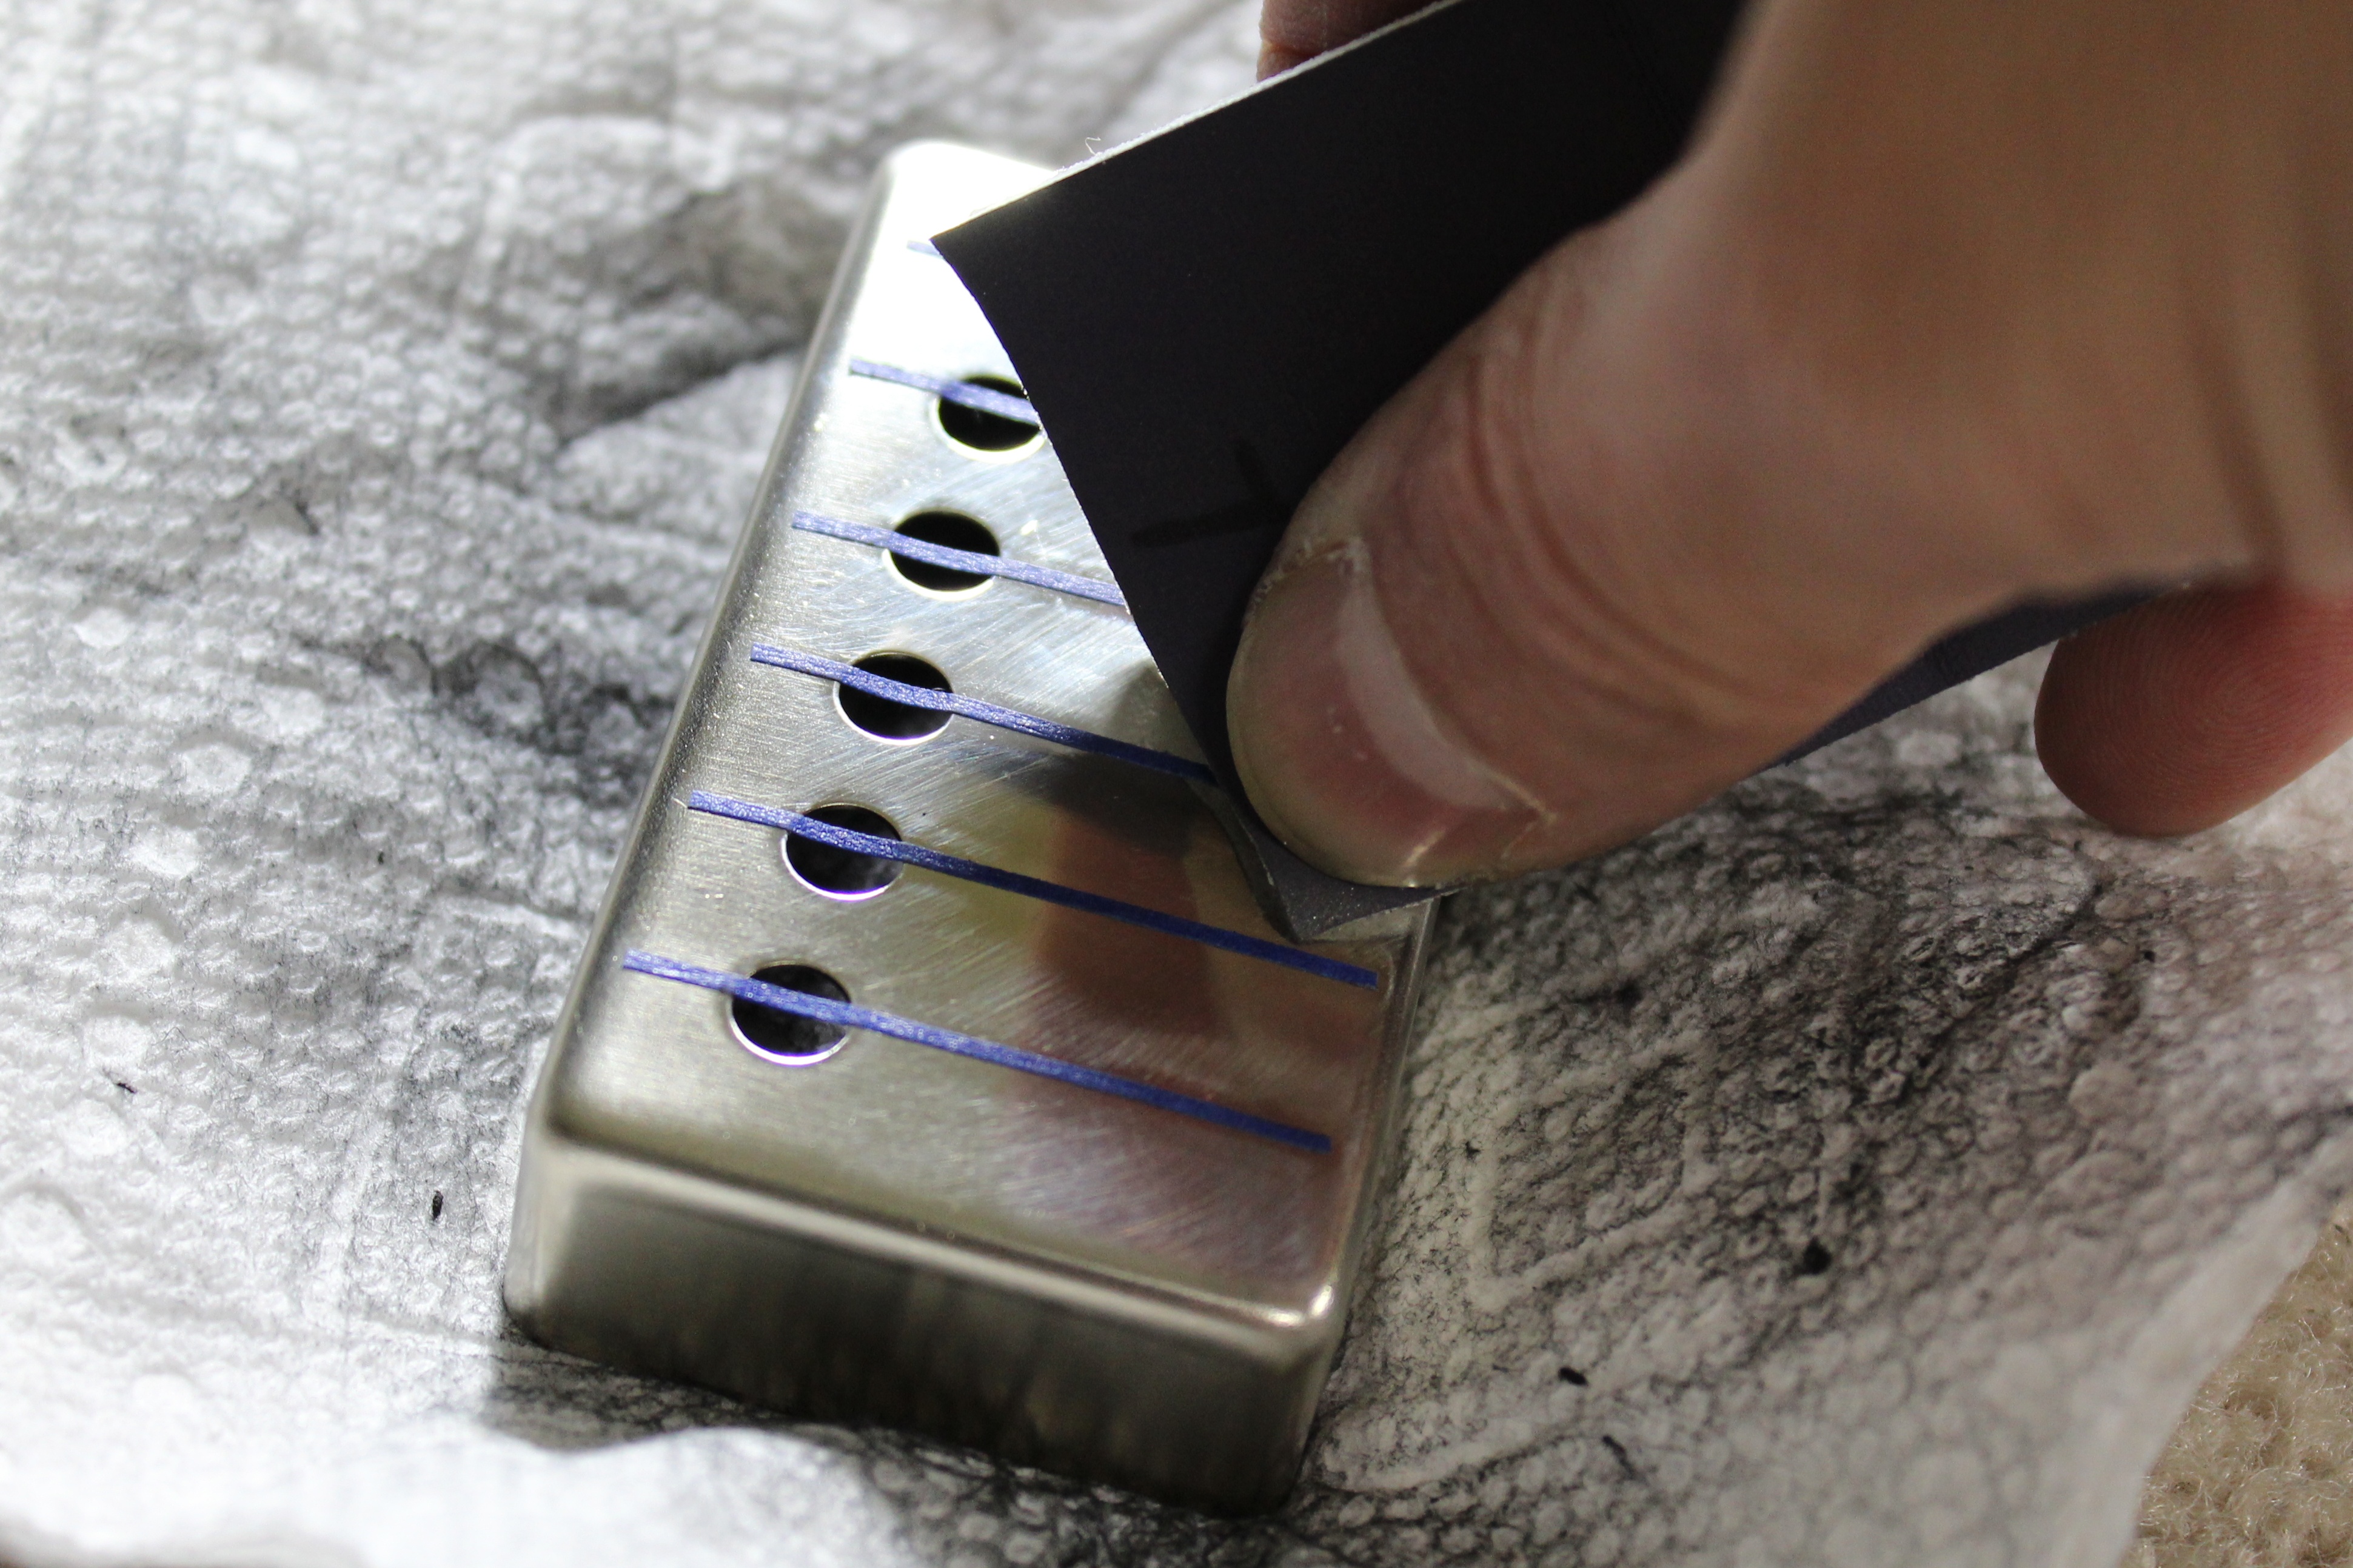
Lets start with the easiest one to make…the brushed metal look.  For this you will need a sheet of Scotch-Brite (or equivalent) abrasive pad. I like to use the 6″ x 9″ size since the larger pad will make it easier to achieve straighter brush lines.  You probably won’t find the 6″ x 9″ pad at your local hardware store. Your best place to find this size is at an industrial supply house like Grainger, MSC, MacMaster-Carr, etc or just do a Google search. They are usually less than $2.00 each  Get the ultra fine grade and a couple of other coarser grades. Each one will give a slightly different look to the pickup cover.

Scotch-Brite Large Ultra Fine Sanding Pad
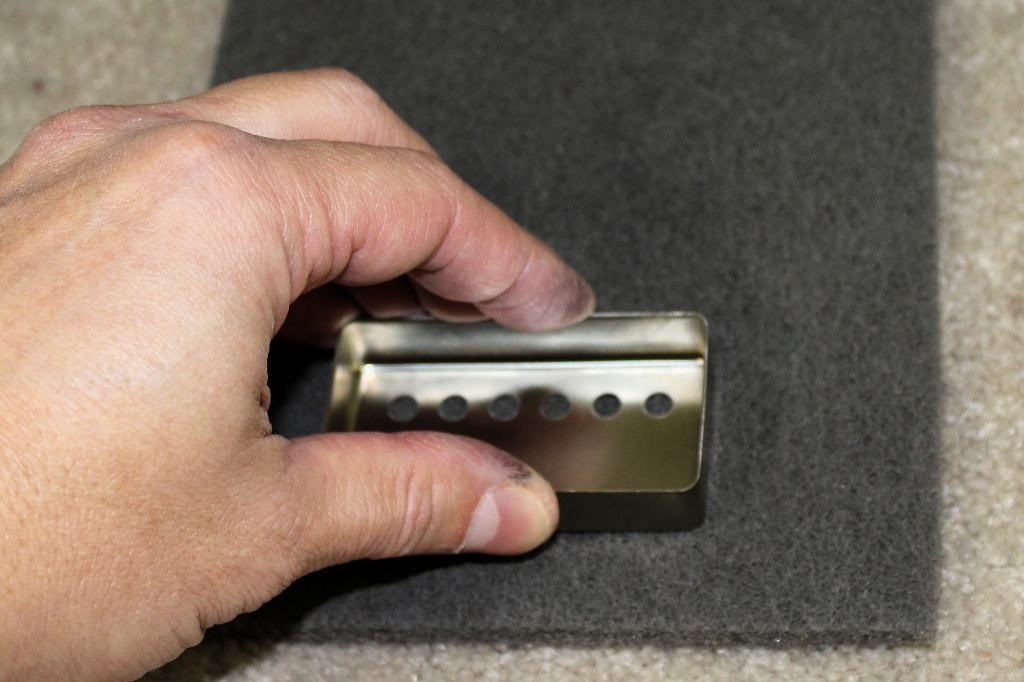
PLEASE READ:  We recommend you wear protective leather gloves while working with unplated pickup covers. The bottom edge can be very sharp and can easily cut open your finger. Filing the bottom edge smooth before you start work is also an option. 

First, clean off any grease from the unplated pickup cover with a paper towel or rag. Place the Scotch-Brite pad on your work bench directly in front of you. Use one hand to keep the pad from moving and the other to slide the pickup cover, face down, in long straight lines. Do this a few times while taking a look at your work after each pass. It usually only take 2-3 pass to get a nice uniform look.  You might find it easier to make a straight line by pulling the pickup cover towards you. You will have to experiment to find out what will work best for you.

Sanding directionYou can do the same thing to the sides once the front is done. Make sure to follow the direction of the lines on the front to make a uniform look.

After SandingBe sure to check back next week as I will show you an easy way to polish a non-plated pickup cover without using any power tools.  We will follow that with how to make faux string lines for the aged pickup look

If you have any questions you can send us an email at support.