Everyone has different ways of shaping a new nut or saddle from a bone blank. Is there a right or wrong way? Nope. There are definitely ways that are a lot faster than others. It typically only takes me about 5 minutes from start to finish…possibly less if I’m in a hurry.
Let me show you how I make one in our shop.
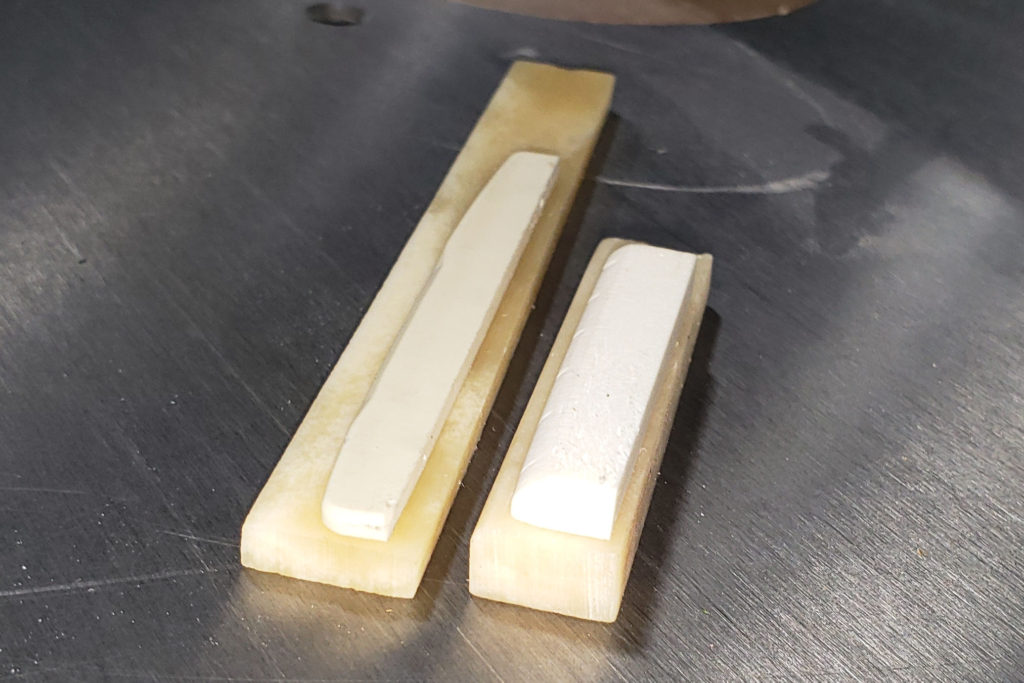
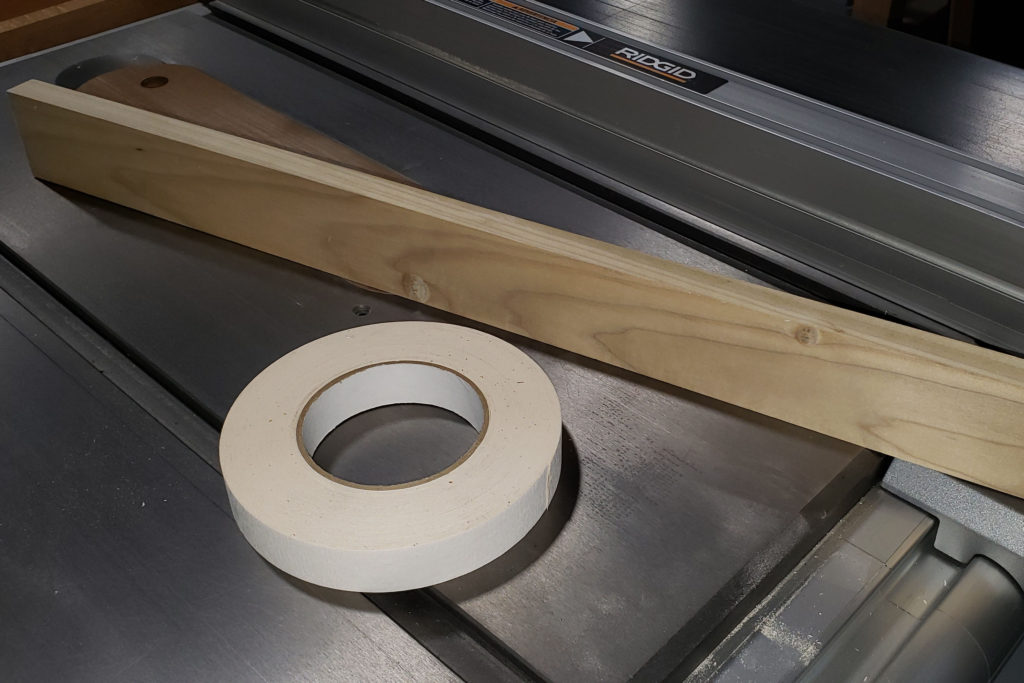
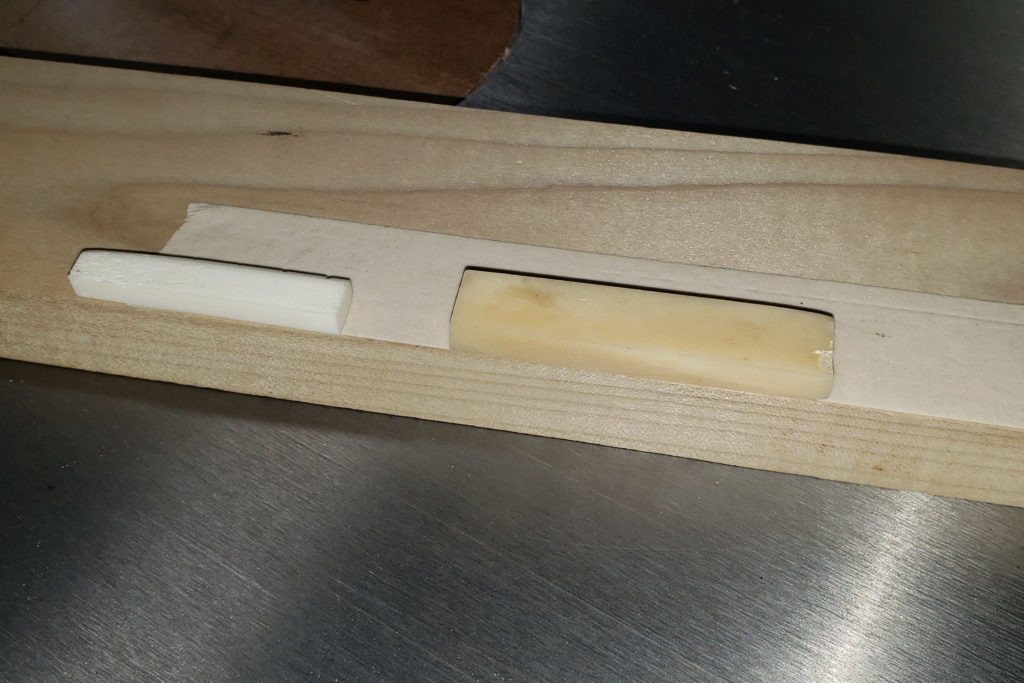
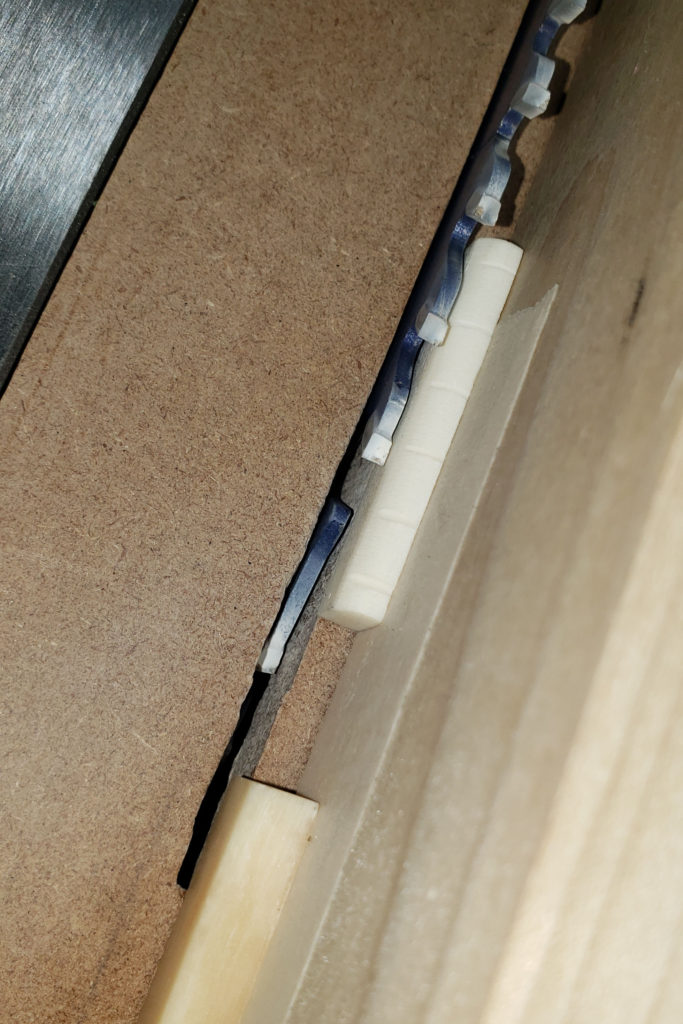
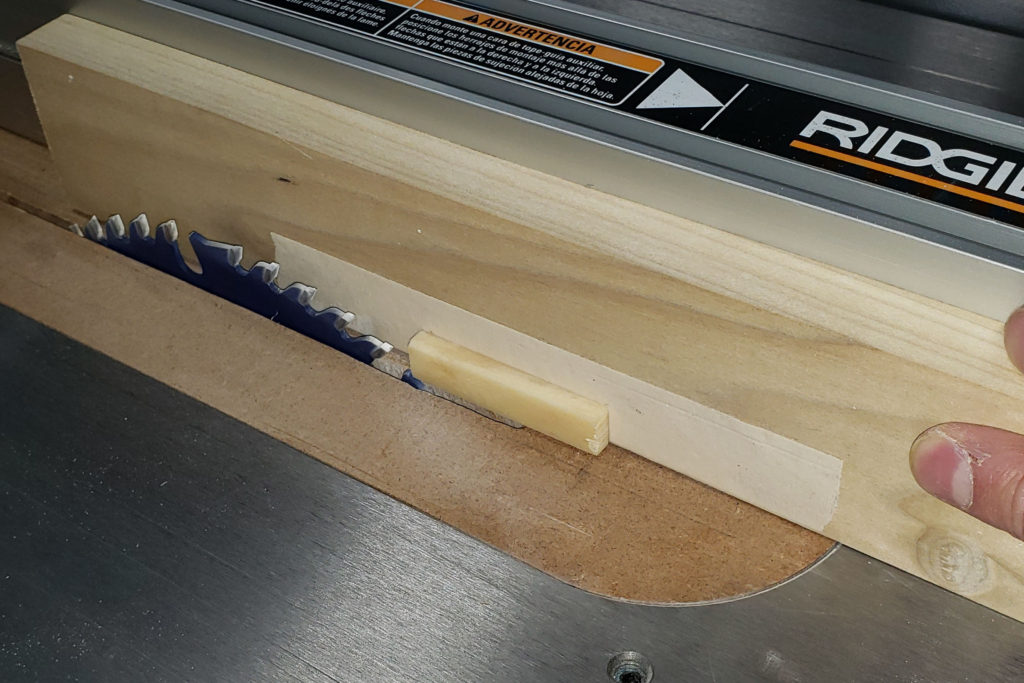
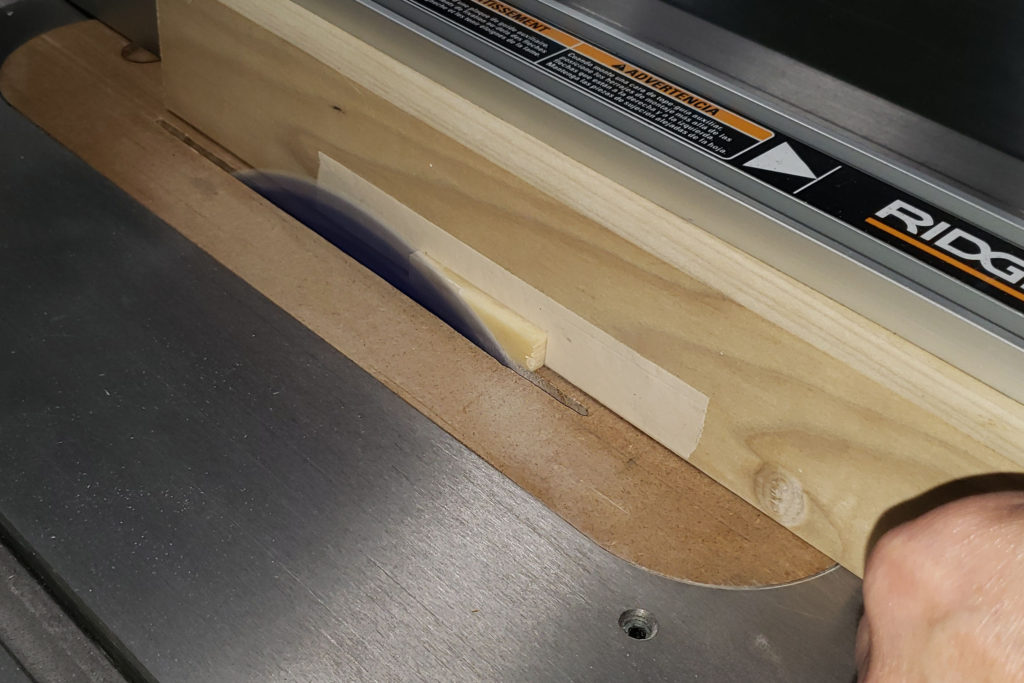
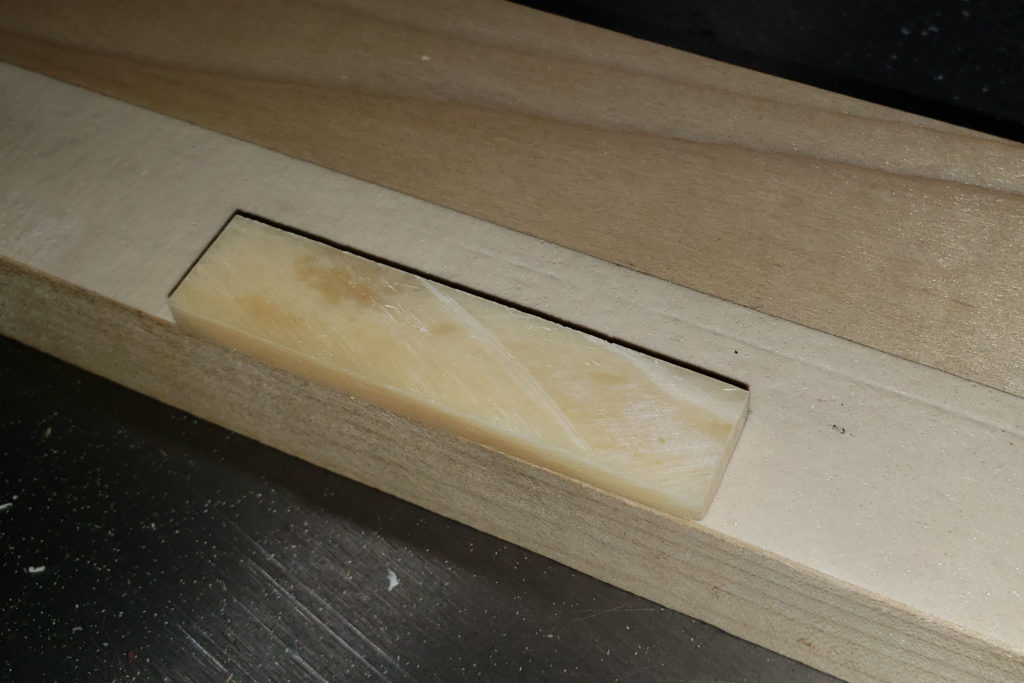
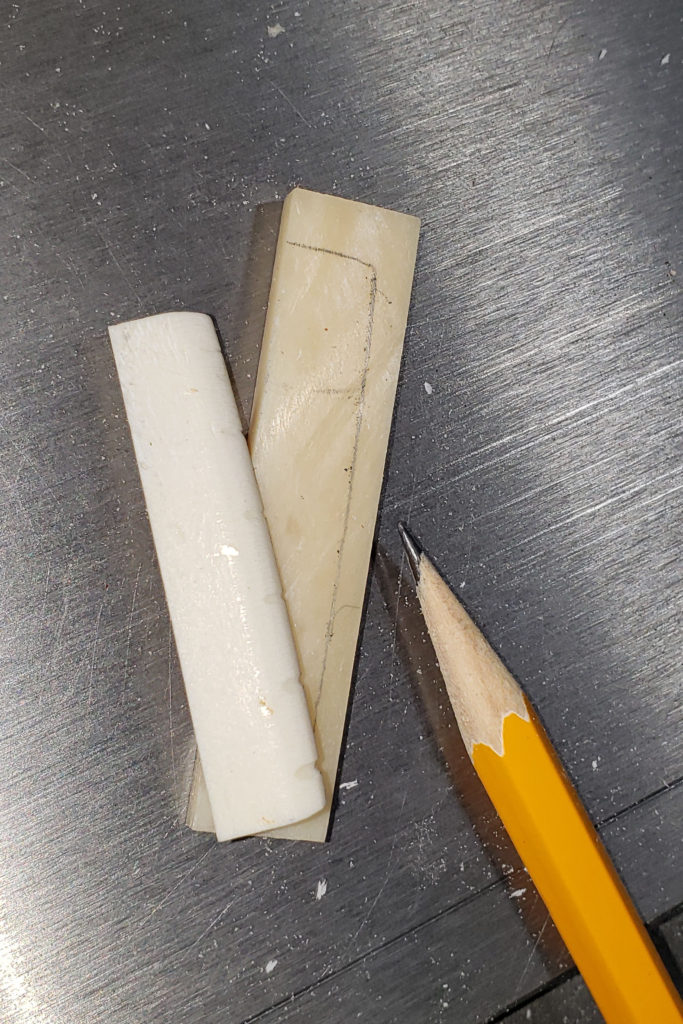
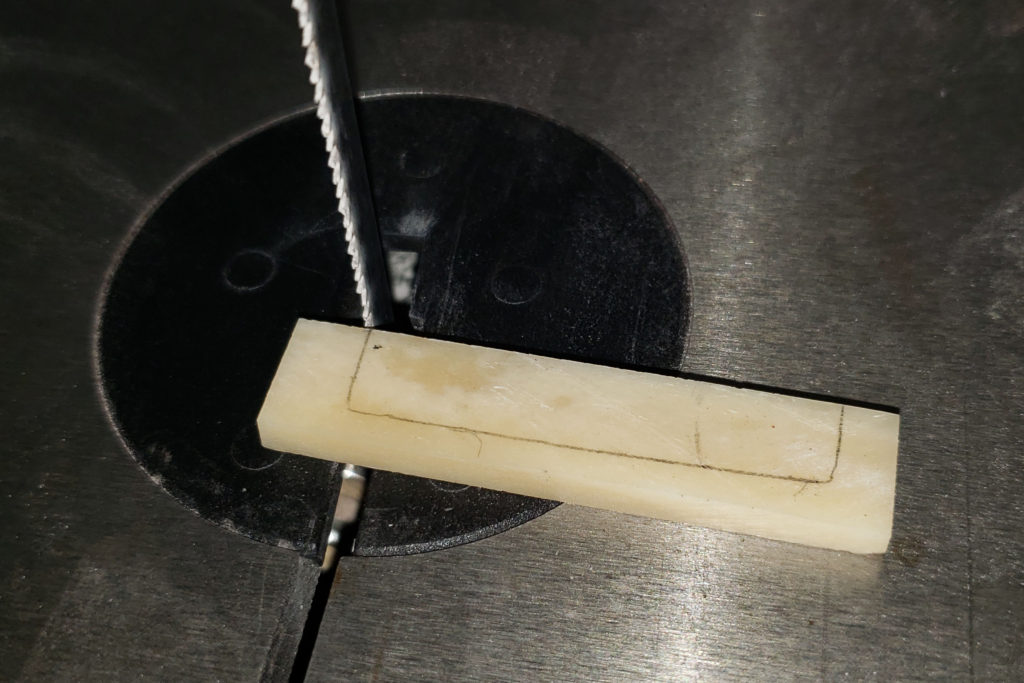
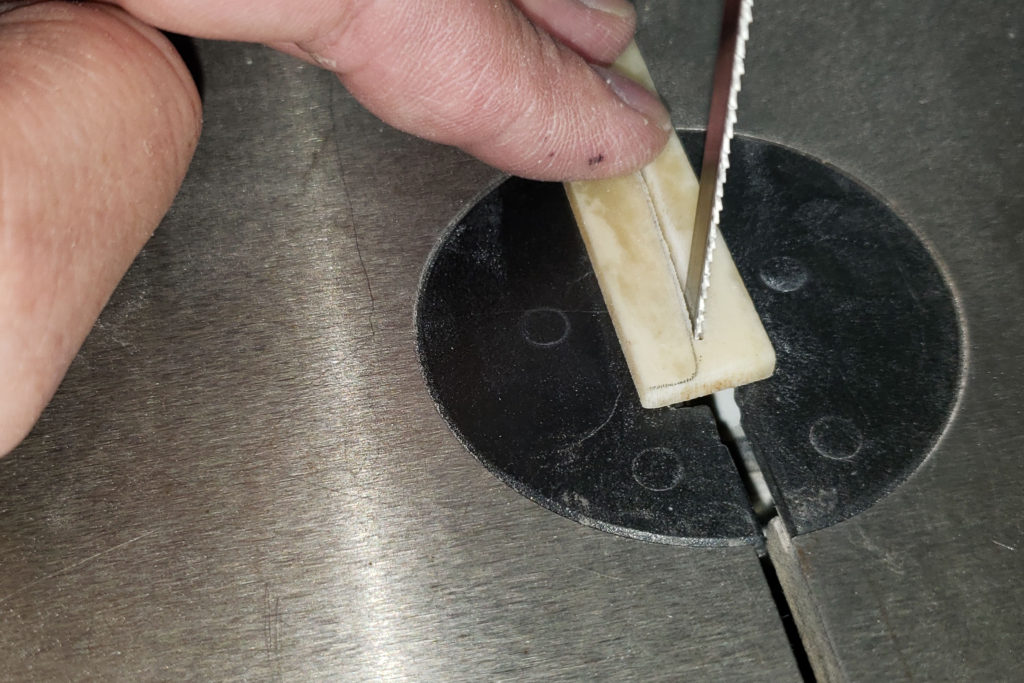
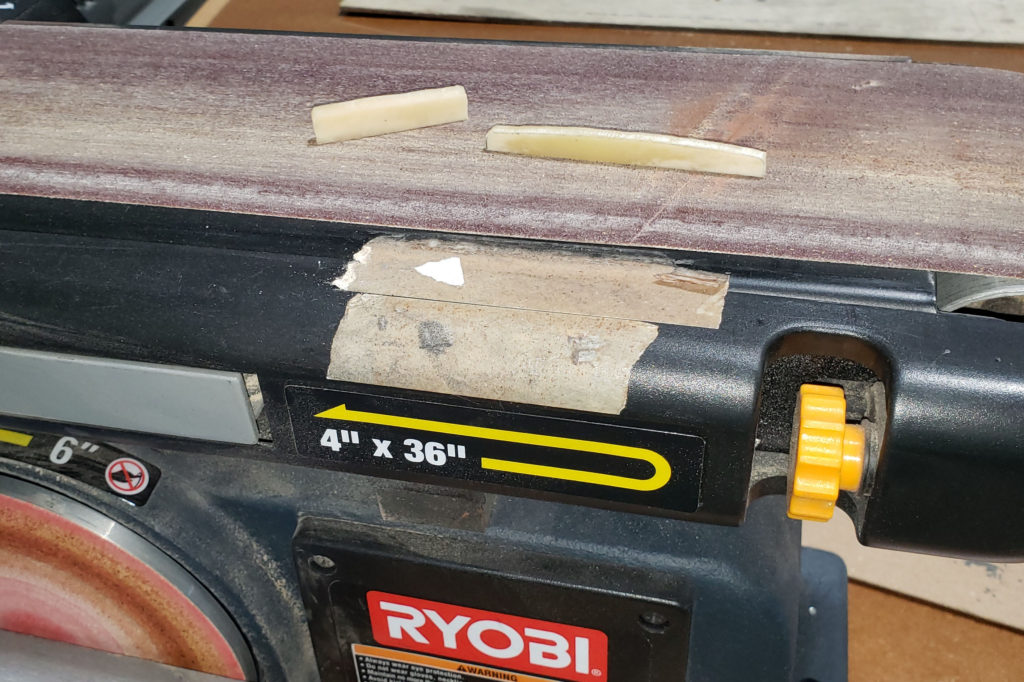
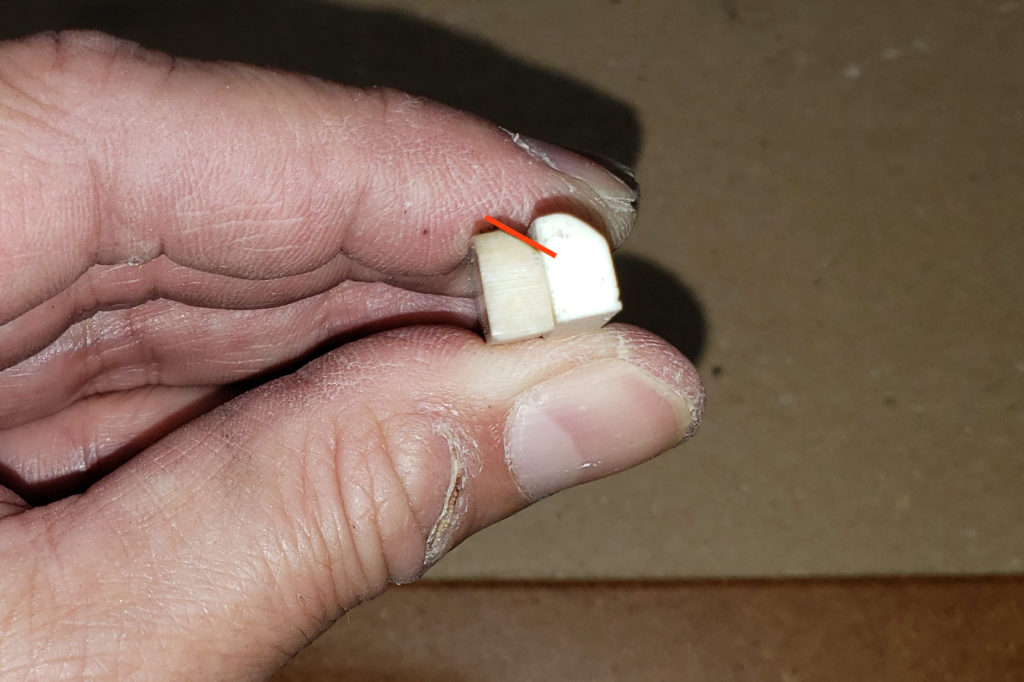
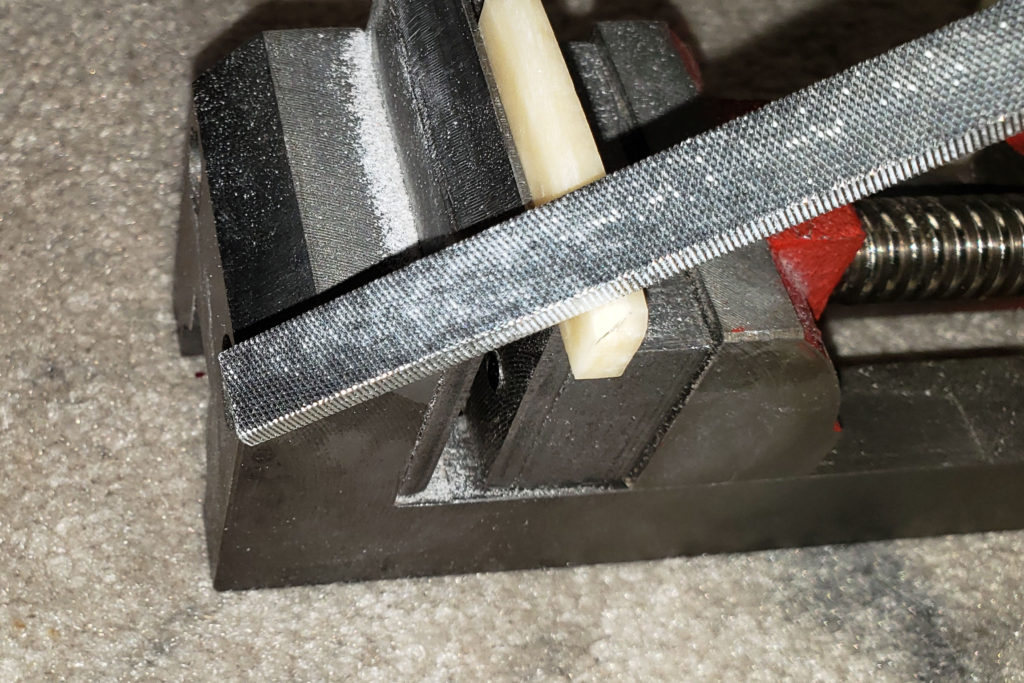
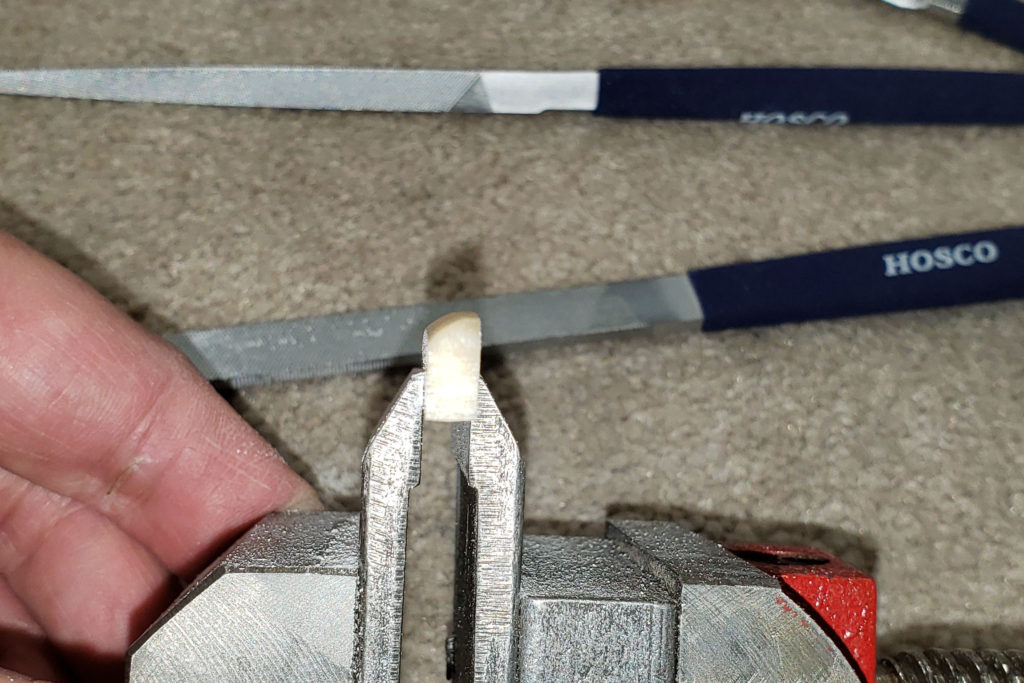
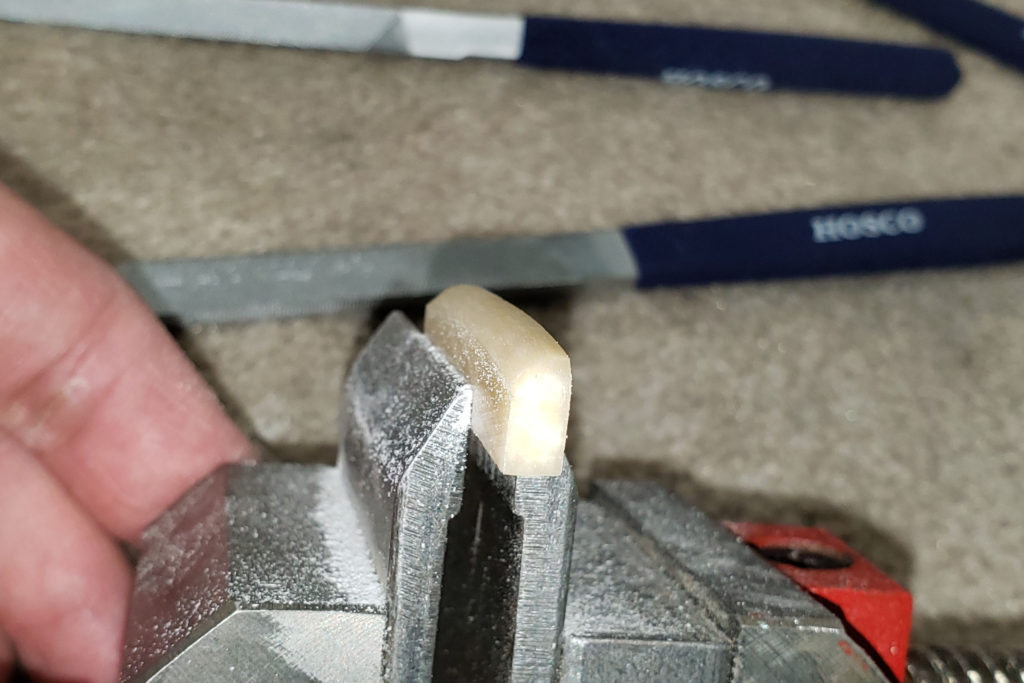
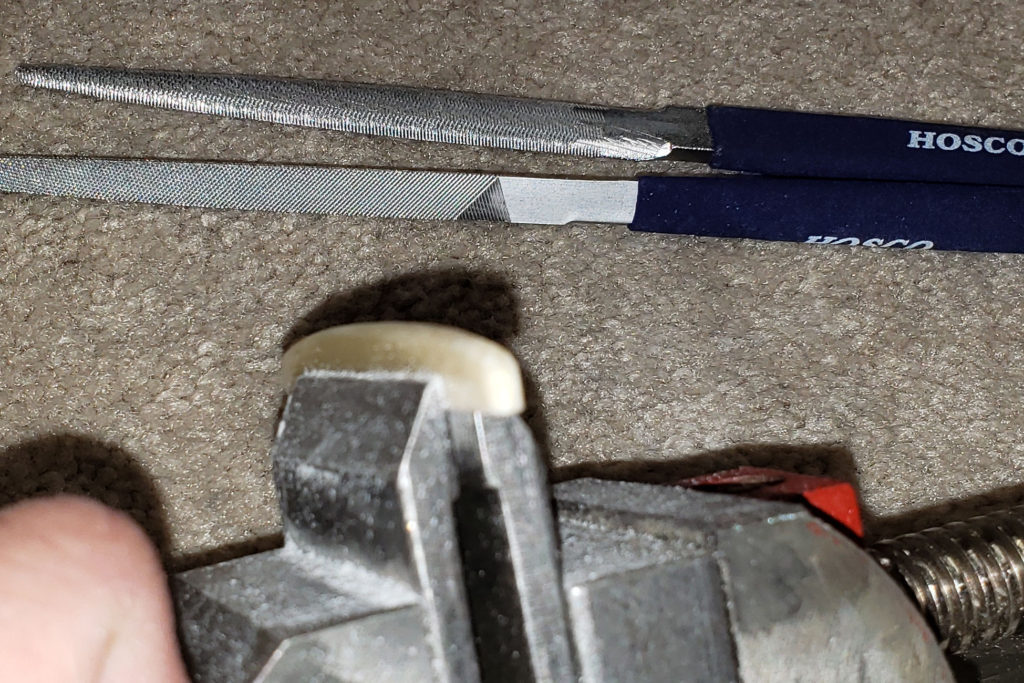
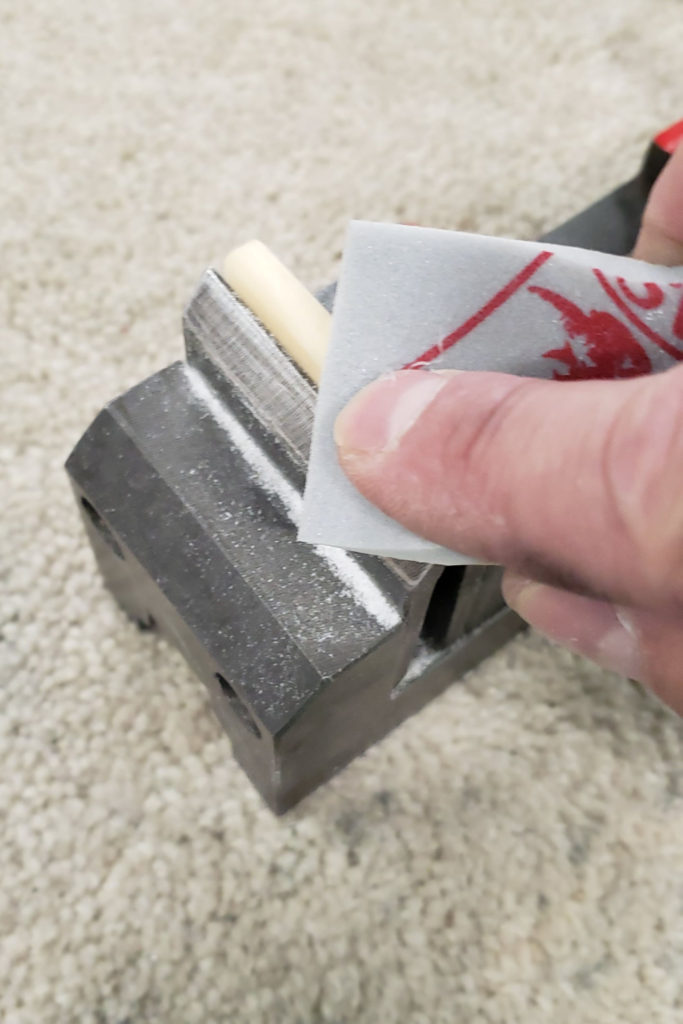
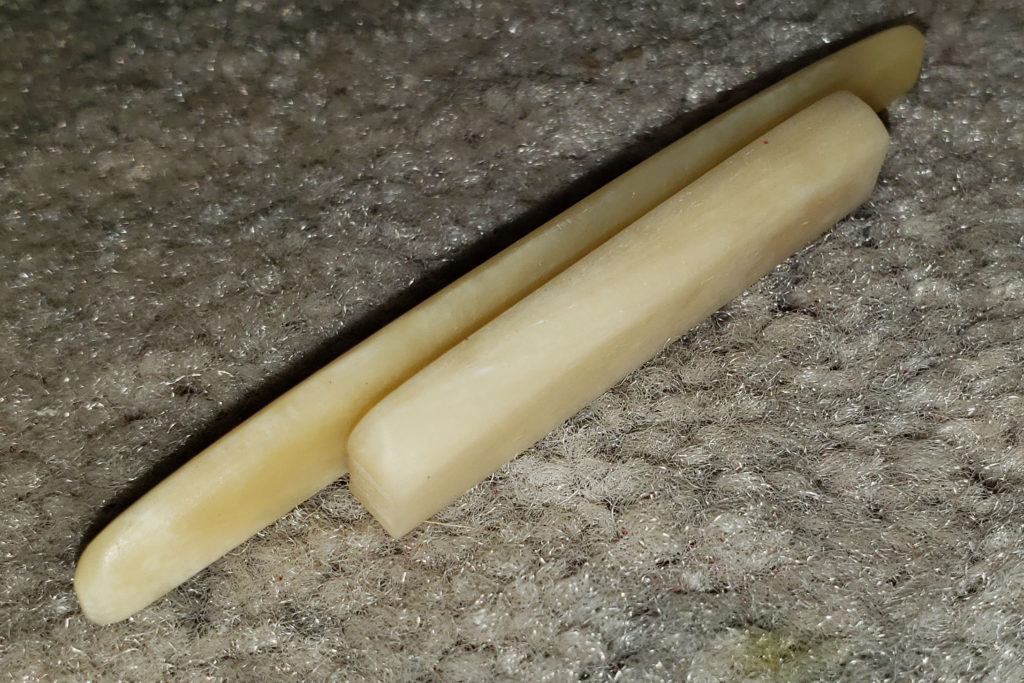
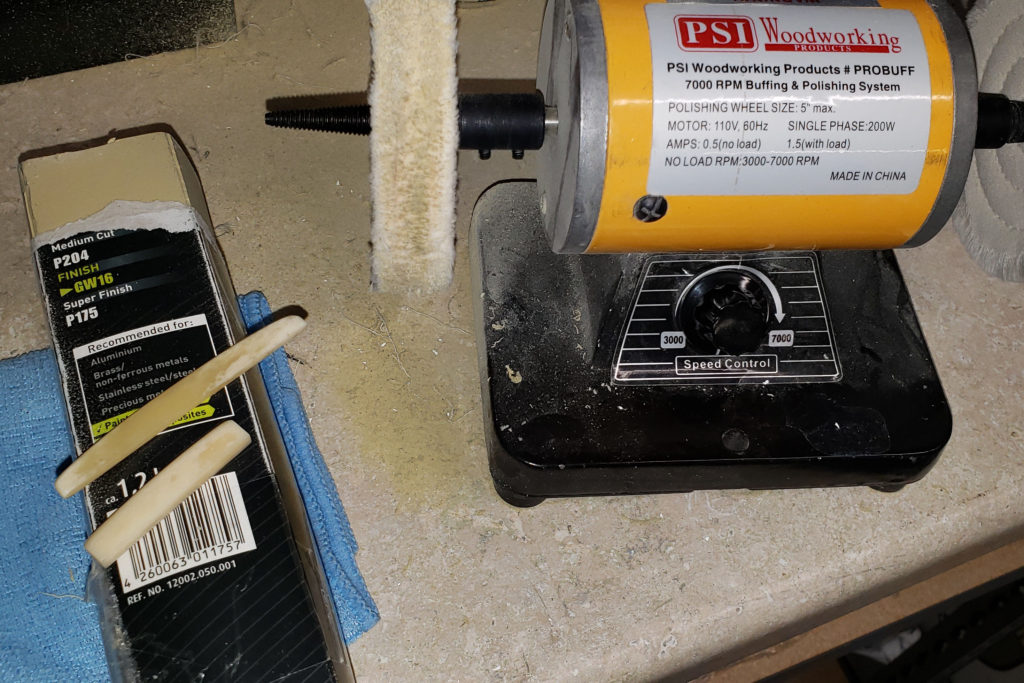
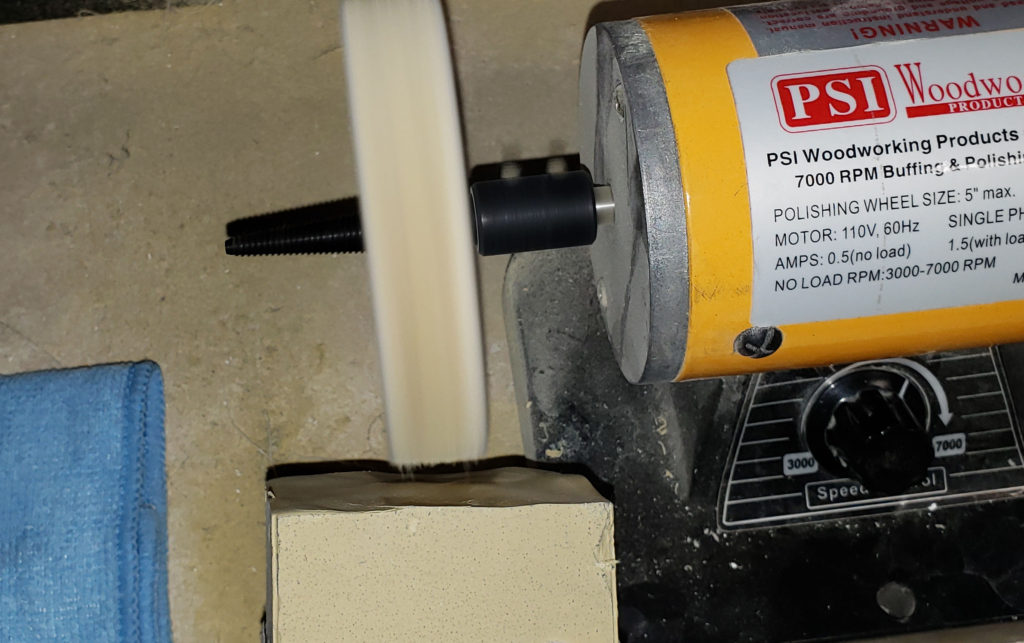
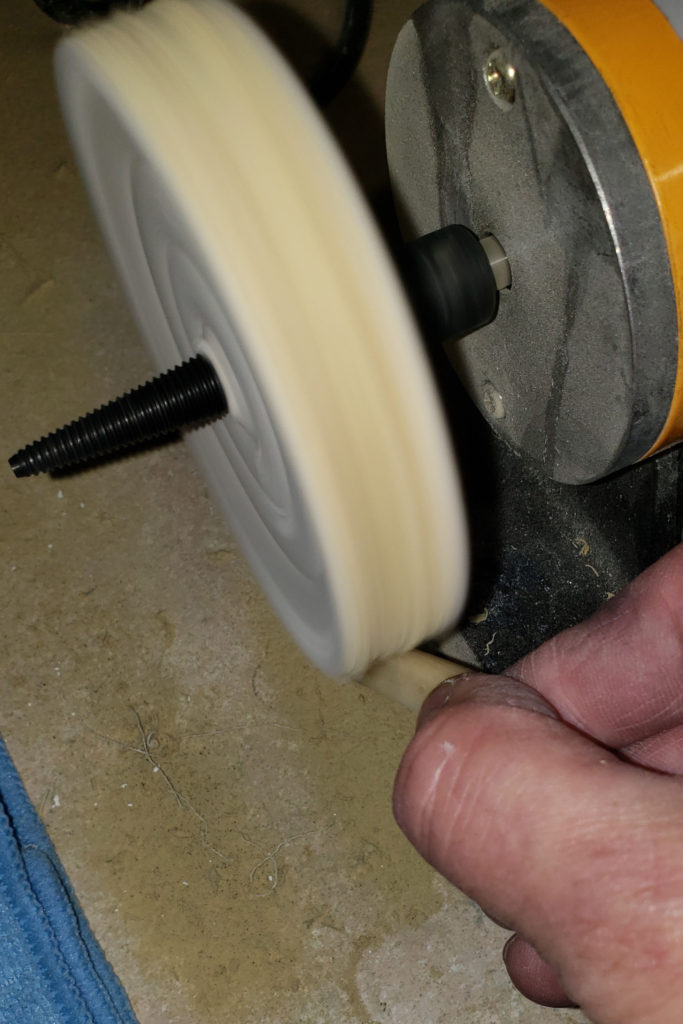
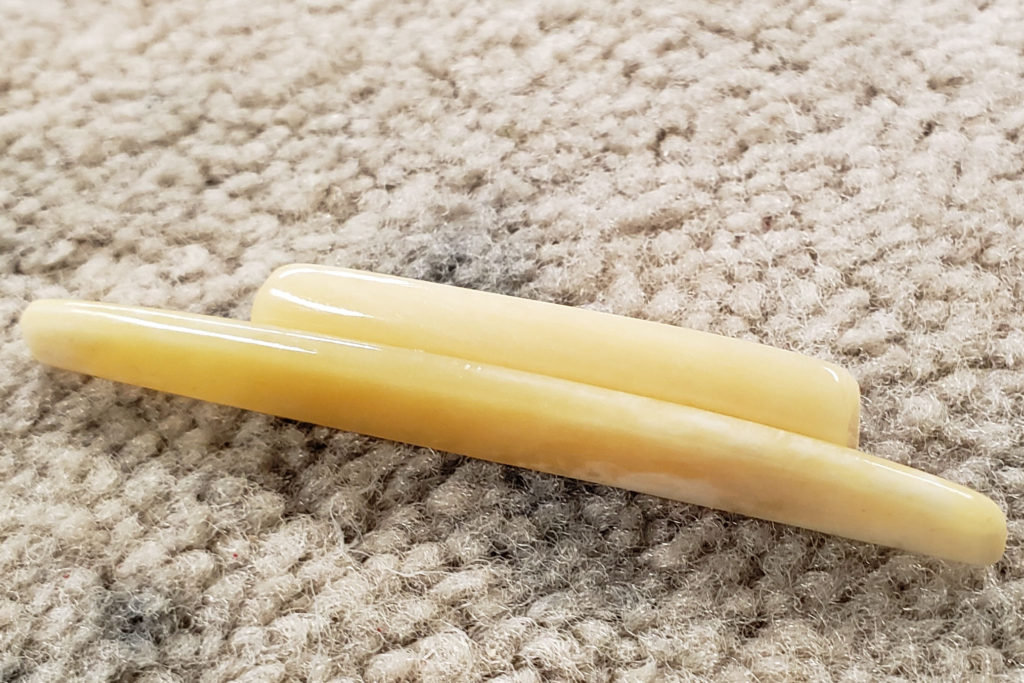
Here you can see how much material is needed to be removed. It is a lot, especially if you are going to try to sand it all away. The secret to getting the thickness down quickly is to use a table saw, a long board, and our template double side masking tape.Next, attach the double side tape to the board and then attached bone blank. Make sure to put some pressure on them to make sure they are securely attached. I like to attach the original nut (or saddle) in front of the blank to use as a guide for setting the thickness.Place the board against the fence and set the thickness I want the blank to be. I sometimes like to leave it slightly thicker so I can fine-tune the thickness later especially when making an acoustic saddle. Here, I am using the original nut as a reference. You will need to remove it before cutting the nut blank so it doesn’t get accidentally damaged.Definitely make sure to use a zero clearance insert on your table saw so you don’t lose the blank in the saw. I should also add, you want to use a large enough board so you can keep your fingers well clear of the spinning blade.Here we are about halfway through the bone nut.OK, so there you go, a bone nut blank thinned to size. Since I’m already set up, I usually will run a few more nuts though so I have a few extra for another job or if I mess up this one.Trace the shape of the nut onto the blank.Here I am using a small tabletop bandsaw to cut out the shape. Make sure to stay slightly outside the line. This can also be done using a tabletop scroll saw.Here we are almost done cutting out the shape. I think this was actually a bone saddles instead of the nut shown in previous images.As you can see, cutting a smooth shape on the bandsaw isn’t critical as long as you stay outside the line you drew. Be careful of your fingertips! I need to come up with a better way to hold on to the nut blanks when profiling them on a belt sander.The nut on the left was just belt sanded with one single facet. The nut on the right is the original nut. I don’t try to make the shape perfect on the belt sander since it can remove material pretty fast. Here is an acoustic saddle with double facets.Here I’m using a nut and saddle file to remove the facets and blend the sharp edges. The nut is held in place with the StewMac Nut and Saddle vise…almost an essential tool when doing this type of work.Side view of the nut after filing.An angled view of the same nut.Here is a picture of an acoustic saddle after filing.Here I’m using foam backed sandpaper to finish the shape and smooth everything out. I typically use 4 grits…120, 220, 320 and 400 grit using the 120 grit for the majority of the work. The other grits are just removing the scratches from the previous sandpaper.Here I’m holding the nut with my hand to round an edge to get the look I’m after.You are basically done here. The matte look is very common. You can go one more step further by polishing them on a buffing wheel. You can get some awesome looking nut and saddles that way.What I’m using here is a small buffing setup that I bought from Penn State Industries (MCLS Woodworking). These are sold for buffing pens but are very handy around the shop for buffing all kinds of small items include bone nuts and saddles! I basically only put buffing compound on the left wheel. I have nothing on the right wheel. I found I can achieve a very nice finish this way. BTW, here I am loading up the left wheel with Menzerna GW16 Finishing compound.Remember to only use the bottom front quadrant when buffing so you don’t accidentally throw the nut at yourself. After buffing with the left wheel, I finish on the right wheel that has nothing on it. I have found that no compound is needed to get the great glossy look.You will be amazed how nice these look after buffing. They almost look like polished stone!
Some final thoughts or questions that some of you might have.
First, is a using a table saw to thin blanks…dangerous? I think so, especially if you don’t know what you are doing or are at least confident in using one.
Second, will this screw up my table saw blade? I haven’t found that to be a problem. I do use a quality carbide tipped blade and never had an issue going back and forth between wood and bone. I have found that a good quality blade will give you a better finish every time whether on wood or bone.
Third, does the type of double-sided tape matter? Yes, absolutely. Use the best you can get. You don’t want the nut blank to come loose when you running it through the table saw. The blank can be a very dangerous projectile.
Here are some links to the items shown in this post.
Small Buffing Setup – https://www.pennstateind.com/store/PROBUFF.html Lots of lesser-priced buffers are available on Amazon and eBay if you are looking to save some money. The compound that comes with it might be OK.
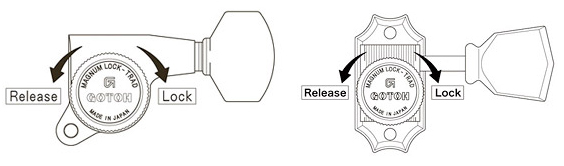
MG-T thumbscrew-style locking tuners use a very simple functionality for locking and unlocking of strings with Gotoh technology.
GOTOH uses standard rotation of thumbwheel to lock and unlock the posts….think..righty-tighty…lefty-loosy.
Notice: Please be advised that thumbwheels do not need to cranked super tight to lock the strings. The specially designed locking pins are rounded to kink the string to help prevent the strings from working loose. Over-tightening the lock can possible break the tuning machines.
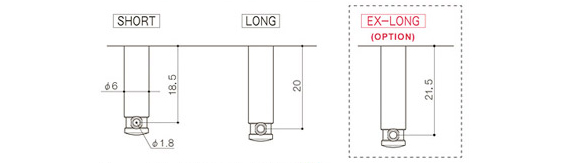
Post Dimensions Option
The MG-T are available in 3 different post heights/lengths. You can choose several combinations for your own staggered posts.
MG-T Post Dimensions
The 3 dimensions Short 18.5mm, Long 20mm and Extra-Long 21.5mm are available.
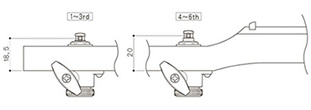
Standard set for L3 + R3 are all Long 20mm posts.
Standard set for 6 in line for both strat and tilt back headstocks are 3 x Short 18.5mm for 1st-3rd strings and 3 x Long 20mm for 4th-6th strings.
**An exception to the 3 short and 3 long posts would be when installing on a guitar that has a thicker than normal headstocks like some ESP/LTD guitars. In this case, your would use 3 long and 3 ex-long posts.


Recent Comments