After test fitting the inlay we can super glue the inlay into place. I recommend FastCap brand super glue. FastCap has super glue available in thin, medium, thick, and Jel formulas. For these inlays, we will use the thick formula. This will help fill the unevenness in the inlay cavities. Since the cavities we routed are also radiused with the fingerboard we are going to need to use spring clamps to hold it down into the slots as the super glue sets. We will use one on each end of the inlays. After about 1 minute you can remove the clamps and the inlays will now hold the radiused shape.
 After the inlays are all glued in place, sand the inlays flush with the fingerboard using a 12″ radius block with sandpaper attached. I taped the fingerboard down to a flat surface using double-sided tape and taped a straight edge parallel to the center line of the fingerboard. Use a straight edge to keep the radius block running down the center of the fingerboard. Use light and even pressure to sand the inlays flush being careful not the change the shape of your fingerboard. These celluloid inlays will sand very easily.
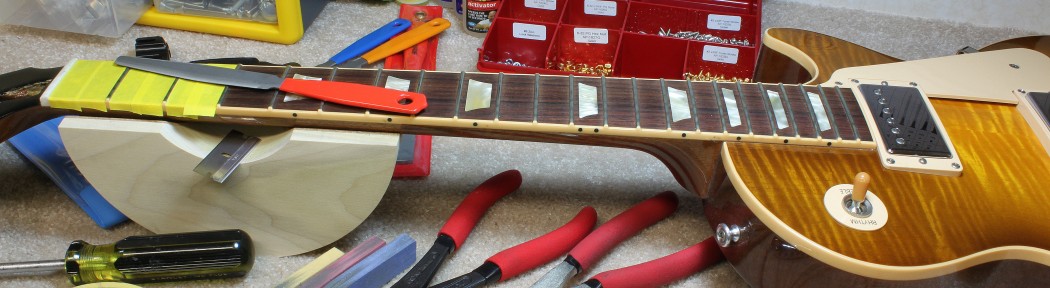
Leave the fingerboard and straight edge attached to the flat surface for the next step. We are going to fill the uneven gaps between the inlay and the fingerboard. You can see in the next picture some of the gaps. While most were nice and tight some are very unsightly. Look at the second inlay from the left.
 Clean the fret slots and any gaps between the inlays and the fingerboard with compressed air. Tape the frets slots to prevent the gap filler from clogging the slots as seen in the above picture.
To make the gap filler we are going to use some fine rosewood sanding dust and Testors plastic model cement (in the orange tube). You can use a scrape piece of the rosewood fingerboard and sandpaper to make the fine rosewood sanding dust. Make more than you think you will need. Mix a small amount of the plastic glue and the sanding dust to make the gap filler. I used my fingertip to press the filler into all the gaps and left it a little high. The filler will sing and get lighter as it dries.

The picture above shows the 2nd or 3rd filling of the gap. After the gap filler dries (about 12 hours) you will want to use the radius block to lightly sand the filler flush. You will usually need to fill the gaps 3 times to completely fill the gaps because of shrinkage.
Sorry i don’t have any pictures of the fret installation. Seemed to have misplaced the set of pictures or accidentally deleted them. Tips on fret installations:
1. Clean fret slots…make sure there isn’t anything that will hinder the frets tangs from properly seating.
2. Use a file to slightly bevel both side of the fret slot. This will also help the fret to set close to the fingerboard surface.
3. Pre-radius your fretwire. Fret wire that matches the fingerboard radius are less likely to pop out of the slots.
4. If you have a fret that is not staying in the slot…use thin superglue at the fret edge. It will have a capillary action and suck the superglue into the slot. Use a spring clamp to hold the fret down until the superglue sets.
5. If hammering the fret in go with light taps across the surface starting at the middle. Hammering to hard will dent the fingerboard at the slot. Will require a lot of fret leveling later to fix.
This fingerboard is going to have nibs (binding over the fret ends) like most Gibson Les Paul guitars have on their fingerboards. Clip the end of the fretwire flush to the edge of the fingerboard. Run a flat file along the edge to clean up the end of the fret.
 Next we are going to install the fingerboard binding. Use double side tape and attach the fingerboard to a piece of MDF that is larger than the fingerboard. This will help us align the bottom edge of the binding. To attach the binding I used a thick superglue formula. Pre-cut the binding for the 3 sides (2 sides and bottom). Attach to small piece of binding to the bottom edge of the fingerboard (where the 23rd fret would be). Make sure to hold it flush with the bottom surface. After the superglue dries (30 sec), trim and sand the installed binding flush on the side of the fretboard and the top to match the radius. Next install the side bindings with the thick superglue. Trim and sand the binding end. Use end nips to trim the binding above the fingerboard and frets to within a 1/16″.

 There is two ways to trim the binding and shape the nibs. You can shave it with a cabinet scraper/file or use a flush trim bit installed on a router table. Using a cabinet scraper and file can take hours. With a flush trim bit it can be down in minutes. The trick to make sure only the bearing rides on the fret board. Adjust the router so cutter only hits the binding.
 Finish up the binding detail with a feather edge and flat file. No need to do a perfect job yet. You will have time to finish the fret ends when dressing and leveling the frets.
 Next we will start on the top carve….
Recent Comments